
Crochet cute bunting for Halloween with this free pattern. Choose from several motifs to crochet your own unique Halloween garland decoration you can enjoy year after year.
Table of Contents
Materials & Notes
- 4 ply/sport/DK weight yarn for the garland chain. The sparkly black yarn I used is now discontinued (Lion Brand Vanna’s Glamour) but Yarnart Manhattan or James C Brett Twinkle DK are similar metallic glitter yarns or you could just use any plain yarn instead.
- 3.5mm (size E) crochet hook – I love Addi swing hooks
All motifs use the same hook size, but please see individual motif patterns linked below for yarn & any additional supplies needed for each design you want to include.
Choose your Motifs
There are 5 Halloween crochet motifs to choose from, all linked to their individual pattern pages below:
- Spider web (easiest)
- Friendly or scary ghost
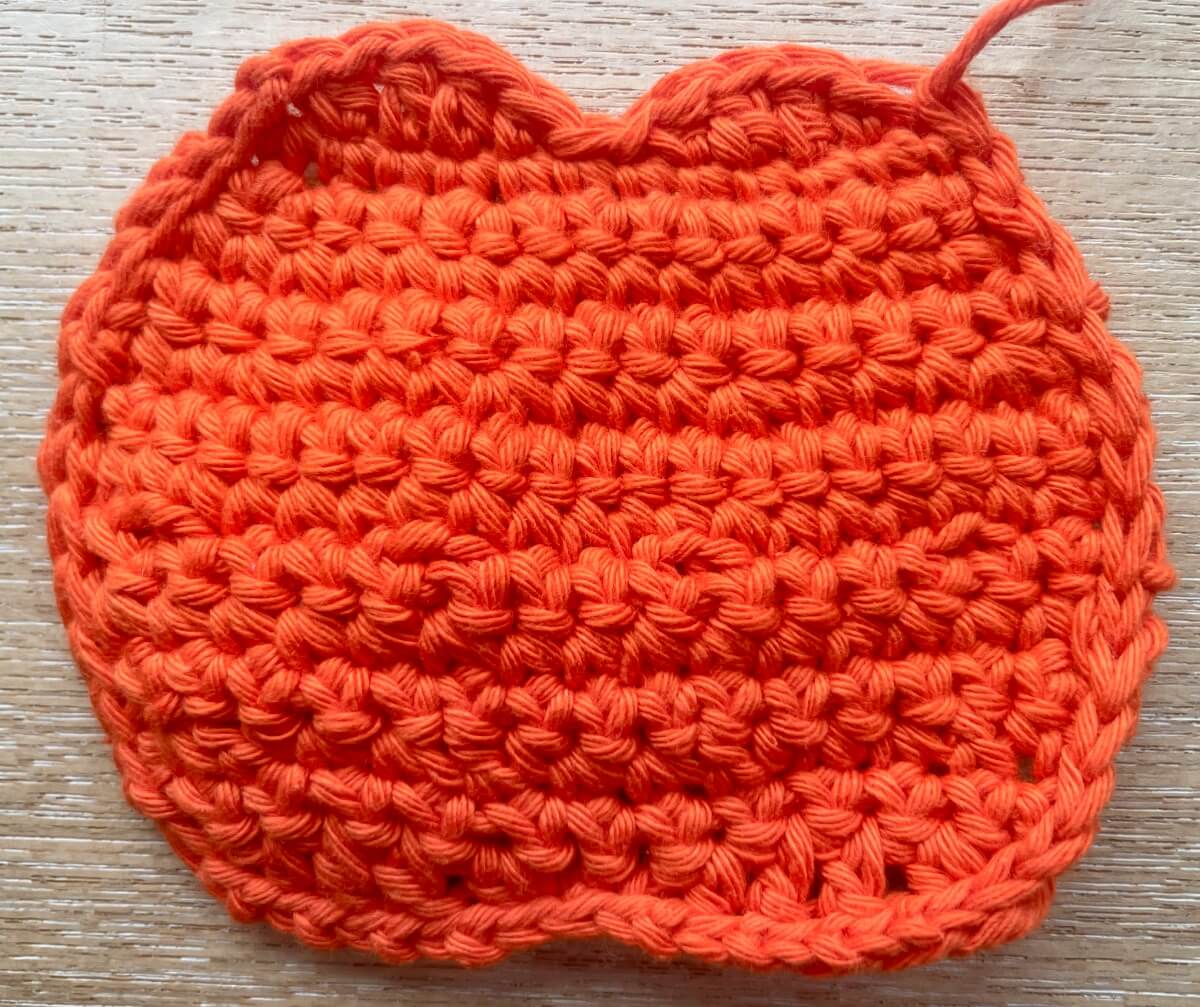
- Pumpkin face
- Bat *New for 2025*
- Halloween cat face (takes longest)
You can make bunting of any length using any combination of these designs.
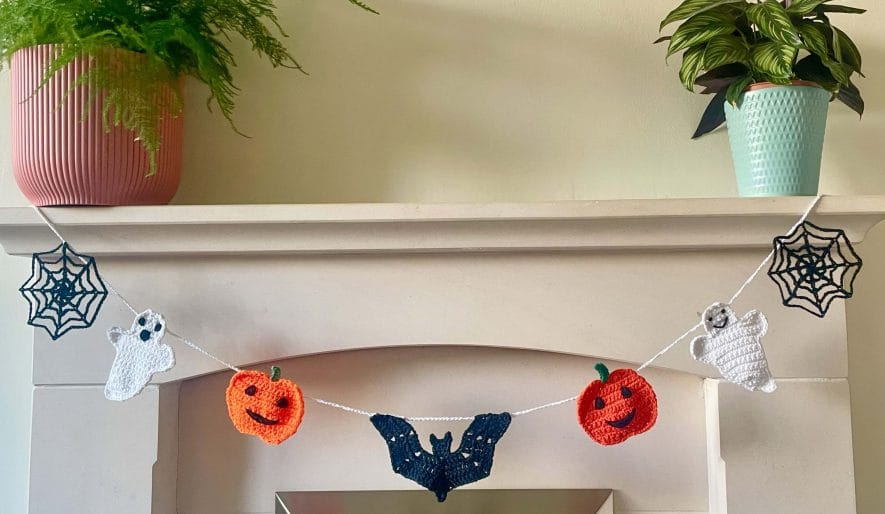
I used 4 motifs in my garland pictured above, with a central cat & 3 other designs on either side. If you want to make this exact version, I’ve included step by step instructions below.
Instead of making all the motifs, you may prefer to alternate between 2 (say ghosts & pumpkins), or go for max monochrome with a striking strand of spider webs or bats.
Think about where you want to hang your bunting & have fun coming up with your own one-of-a-kind garland.
Halloween Crochet Decorations Video Tutorials
I’ve added full step by step video tutorials for the spider web and ghost crochet patterns. Check them out below:
Crochet the Garland String
Once you have made your motifs, it’s time to join your motifs with chains to form your garland.
For bat bunting, there’s no garland string needed. You just join the bats together at their wing tips – see the step by step garland instructions on the bat pattern page.
Otherwise, you have a few options to crochet your garland string:
- Start at one end and work all the way along to the other end.
- Start with a central motif and work out to one end & then repeat for the other side.
- Join each pair of motifs separately with a length of chains, weaving in the ends at each motif side.
Joining individually is easier as it avoids needing to work across the back of each motif (excluding spider webs). But you do then need to weave in the ends on each motif.
I prefer to chain the whole garland together in one go as it’s a bit quicker and I find the longer chain string a bit more robust.
If you want to change some motifs afterwards, there’s no need to redo the whole string. Just cut through the chains between motifs you want to change, remove both sides and chain together your new motifs. It’s no big deal & your bunting should still hang well.
Top tip: just join a few together first and hold these out to review the spacing. It may take a few goes to get it right for your setting.
I’ve provided full instructions for my garland version below, but the general guidelines are:
- Use 4ply/sport yarn with a 3mm hook for a finer string (I used Ricorumi DK fine cotton),
or dk yarn with a 3.5mm hook or worsted/aran with a 4mm hook for a thicker, more sturdy string. - Choose the string colour: black string stands out & adds to the dark Halloween vibe, white is more subtle and lets your motifs shine, a natural / beige colour gives a rustic Fall feel or how about using silver for some spooky sparkle?
- Use the same length chain between most motifs.
I made 20 chains with sport weight cotton & 3mm hook or 17 chains with DK & 3.5mm hook, for a hanging gap of 10cm. - Use a longer length chain either side of a spider web, because these hang from a point & take up more space horizontally.
I made 25 chains with sport & 3mm hook or 21 chains with DK & 3.5mm hook, for a hanging gap of 13cm. - Make a longer length chain at each end of the garland, depending on your use case & whether you need to tie the ends etc.
- You can optionally add a loop at each end for hanging by making an extra 12 chains at the end and then slip stitching into the 12th chain to form a loop. Do more/fewer chains to adjust the size of the loop as needed.
Attaching Motifs to the Garland
If you are joining multiple motifs together at once, you need to attach the back of your motifs in between your chain lengths.
If you just want to make my exact version, attaching is outlined in the step by step instructions below. But here are more detailed guidelines for attaching each motif type that will work for whatever layout you choose.
How to Attach a Spider Web Motif
Spider webs are the easiest to attach. First chain until you want to add it. With the back of the web facing you, put your hook through one of the 8 edge points of the web, yarn over hook & pull through the web and the chain on your hook. Your web is now attached & you can continue chaining.
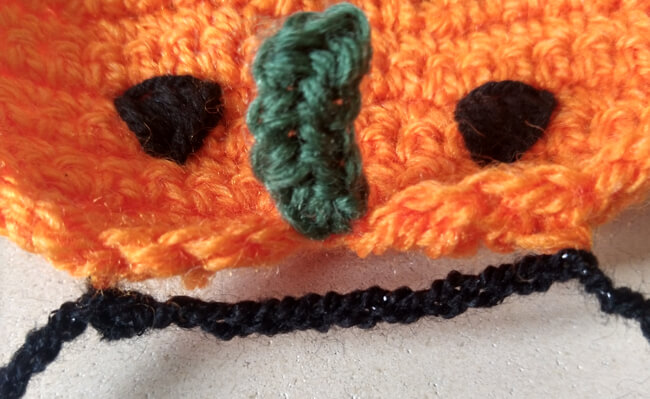
How to Attach Pumpkin & Ghost Motifs
First chain until you want to add your motif. With the back facing you, put your hook through 1-2 loops near the top & side closest to you. Yarn over hook & pull through the motif loop(s) and the chain on your hook. Your motif is now attached at a single point.
Make enough chains to make a gentle downward curve across to the other side of the motif.
Using sport weight cotton with a 3mm hook, I did 15 chains across a pumpkin & 8 chains across a ghost.
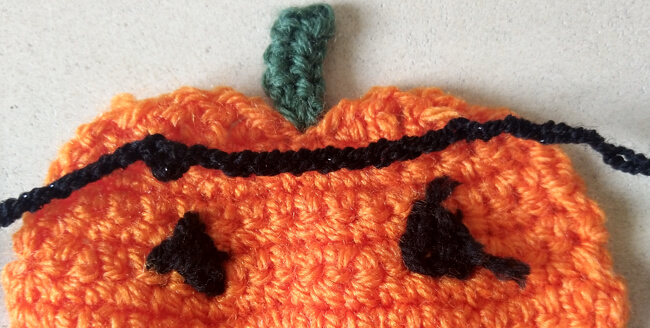
Repeat as for the previous side, put your hook through 1-2 loops near the top & far side. Yarn over hook & pull through the motif loop(s) & the chain on your hook.
Your motif is now attached at both sides, connected by a loose chain curve. Check the front to make sure you can’t see the stitches & continue on with your chain until the next motif.
How to Attach a Bat Motif
Because the bat is quite wide, it can make the garland sag down if you attach it just at the wings, especially if you make it with sturdy cotton and stiffen it.
After much trial and error, the best way I’ve found to attach bats so they keep their shape and hang nicely with the other motifs is to crochet chains between the wings above the bat’s head as follows:
- Start the same way as ghosts and pumpkins. At the back of the bat, put your hook through 1-2 loops near the top wing corner closest to you. Yarn over hook & pull through the bat loop(s) and the chain on your hook.
- Make enough chains to make a gentle downward curve across to the inner edge of the wing, which is slightly lower. I did 10 chains with sport cotton & a 3mm hook.
- Put your hook through 1-2 loops of the bat here, slightly down from the top so you won’t see them from the front. Yarn over hook & pull through the bat loop(s) & the chain on your hook.
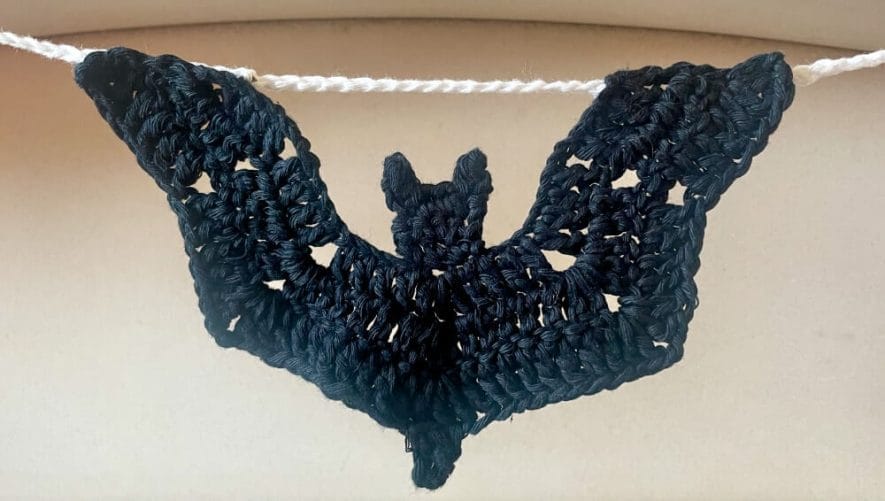
- Now chain just enough to make a taut straight line across to the same point on the other wing. You don’t want any extra chains or slackness here, as this firm line of chains across the top of the bat is what keeps its shape and prevents it dragging down and out. I made 16 chains here as a guide.
- Repeat steps 3, 2 & 1 on the other wing, attaching at points at the inner and outer wing edges, with a curve of chains in-between.
Here’s how the back and front of the bat look when you’re finished:

How to Attach a Cat Face Motif
I also found getting the cat face motif to hang right a bit trickier. Attaching the tops of the ears distorted the face shape when hung. But attaching between the ears made the ears droop.
So I used a modified version of pumpkins & ghosts method as follows:
- With the back facing you, insert your hook a little below the nearest bottom ear corner, close to the edge. Yarn over hook, pull through the cat loop & your chain. Repeat this process to make another slip stitch beside this moving inwards.
- Make a loose chain curve to reach across to the far side of the ear.
I did 12 chains with DK yarn & 3.5mm hook. - Work in slip stitch across the middle part of the head. Put your hook into a loop at the bottom of the top row of crochet, yarn over hook & pull through the cat loop and the loop on your hook to make a slip stitch and repeat across 7-8 stitches until you reach below the other ear.
- Make another loose chain curve (same number of chains as in step 2) & then do a couple of slip stitches near the far edge below the ear to match the other side.
So on the back of your cat face you have 2 loose chain curves under each ear, connected by slip stitches across the back of the head and at each side of the cat. Your cat face is now attached & you can continue chaining.

My Halloween Garland Version
Step by step instructions for the garland shown in the pattern photos
2. Make 2 Ghost Motifs
Follow the ghost pattern to make 1 friendly & 1 scary ghost facing opposite directions.
3. Make 2 Pumpkin Faces
Follow the pumpkin face pattern.
4. Make 2 Spider Webs
Follow the spider web pattern and optionally soak them in stiffener and pin them out to dry (see pattern video / instructions).
5. Start your Garland String
I used white fine DK cotton with a 3mm hook for my 2025 bat version, and black DK yarn with a 3.5mm hook for my original cat version.
Chain 12 and slip stitch in first chain to form a loop for hanging. Chain 30 or however long you want before your first motif.
6. Attach a Spider Web
With the back of the web facing you, put your hook through one of the 8 edge points of the web, yarn over hook & pull through the web and the chain on your hook. Chain 25.
7. Attach the Friendly Ghost
With the back of the ghost facing, put your hook through a loops near the top & side closest to you. Yarn over hook & pull through the ghost loop and the chain on your hook. Chain 5 & repeat near the top on the far side to attach it there. Chain 20.
See ghost & pumpkin attachment explanation for close up pictures.
8. Attach a Pumpkin Face
With the back of the pumpkin facing, put your hook through 2 loops near the top & side closest to you. Yarn over hook & pull through the pumpkin loops and the chain on your hook. Chain 10 & repeat near the top on the far side to attach it there. Chain 20.
See ghost & pumpkin attachment explanation for close up pictures.
9. Attach the Central Bat or Cat
Bat Motif:
At the back of the bat, put your hook through 1-2 loops near the top wing corner closest to you. Yarn over hook & pull through the bat loop(s) and the chain on your hook.
Chain 10 to make a loose curve over to the inner wing edge. Put your hook through 1-2 loops of the bat here, slightly down from the top so you won’t see them from the front. Yarn over hook & pull through the bat loop(s) & the chain on your hook.
Chain 16 or just enough chains to make a taut straight line across to the same point on the other wing.
Now repeat the same steps on the other side, attaching at points at the inner and outer wing edges, with a curve of chains in-between. See bat attachment explanation above for photos and more info.
Cat Motif:
With the back facing you, insert your hook a little below the nearest bottom ear corner, close to the edge. Yarn over hook, pull through the cat loop & your chain. Repeat this process to make another slip stitch beside this moving inwards. Chain 12.
Slip stitch across the 7-8 stitches at the bottom of the top row of crochet across the middle part of the head.
Chain 12 & do another couple of slip stitches near the far edge to match the first edge. Chain 20.
See cat face attachment explanation above for more details.
10. Attach a Pumpkin Face
Repeat step 8.
11. Attach the Scary Ghost
Repeat step 7 but chain 25 at the end instead of 20.
12. Attach a Spider Web
Repeat step 6 but omit the chains at the end.
13. Finish your Garland Chain
Chain 30, or however long you want at the end (match the number of chains you made before the first motif in step 5). Chain 12 and slip stitch in 12th chain to form a loop for hanging.
I hope you have fun creating your own halloween crochet garland or bunting. I’d love to see a picture if you do. Just tag @craftfixblog on Instagram.
If you have any questions or feedback about the patterns, just comment below.
This free pattern is for personal, non-commercial use only. It may not be copied, sold, translated or distributed in any way without permission.


