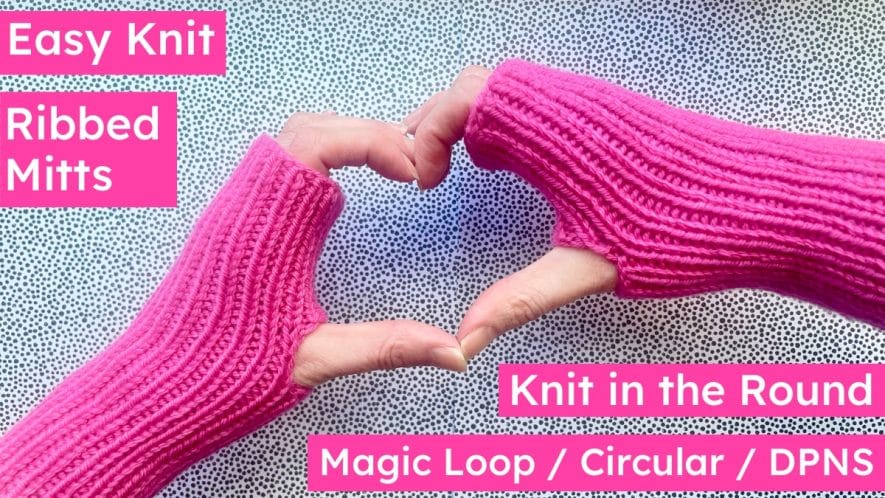
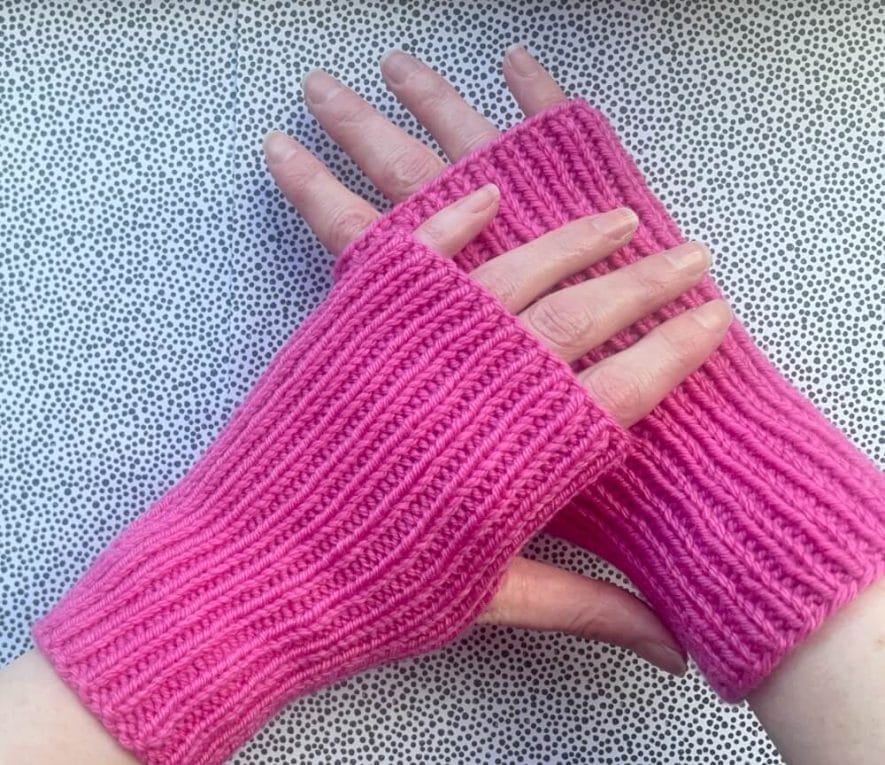
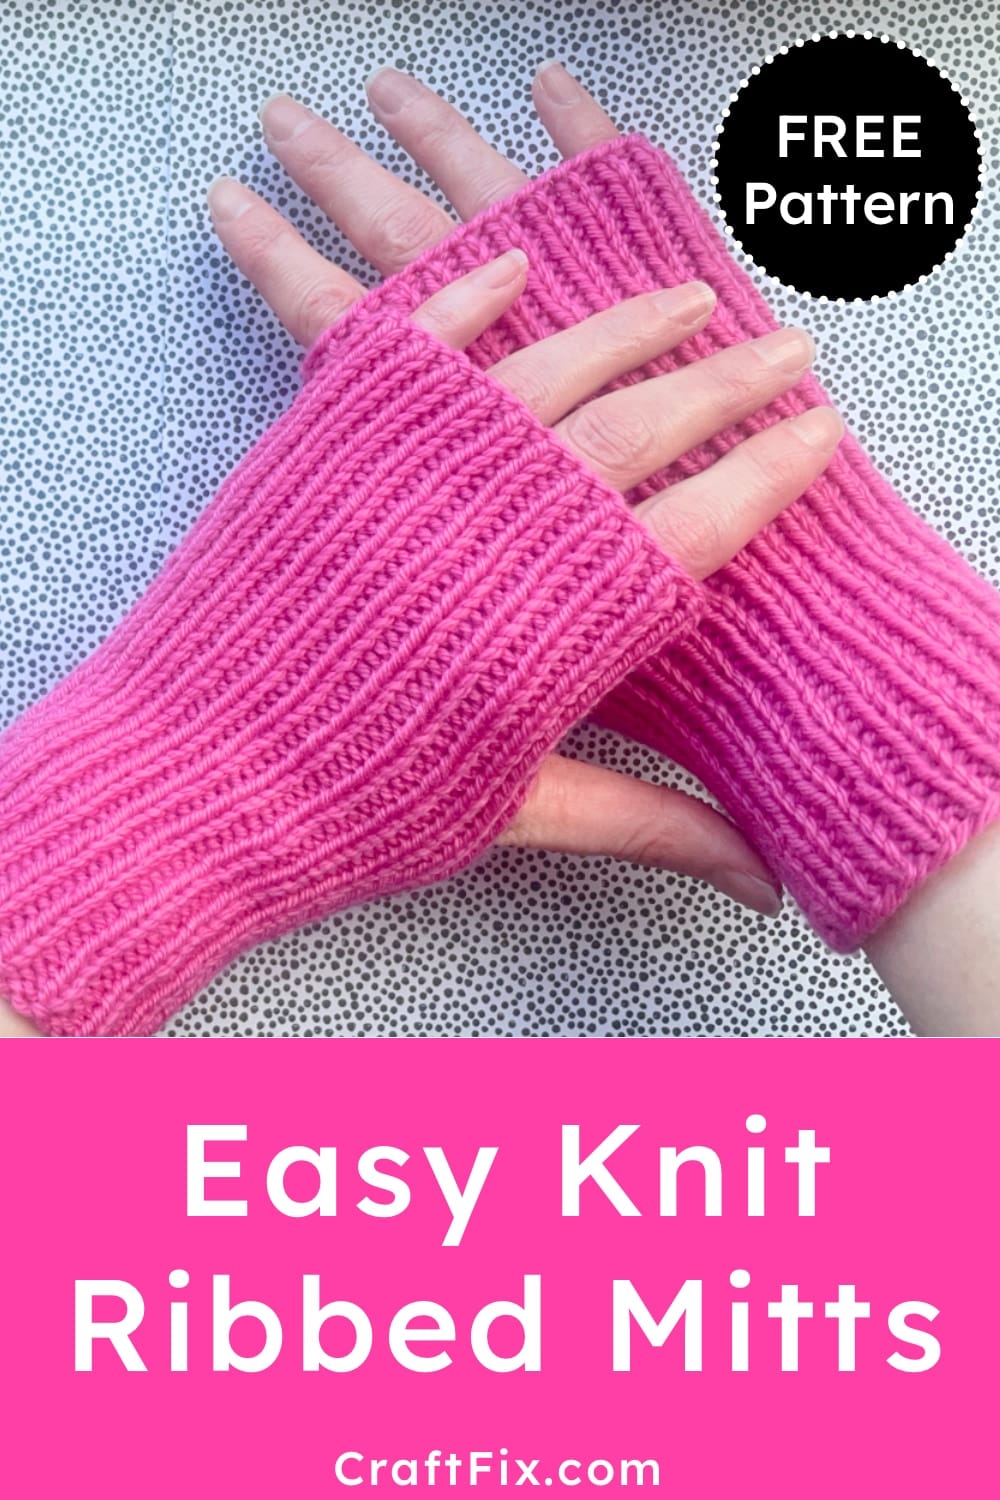
These quick & easy mitts, in 2 stretchy sizes, are all 1×1 rib for a great fit.
Knit seamlessly in the round, they make a great first magic loop knitting project.
Beginner friendly, you just cast on and off stitches to make a gap for the thumb.
Knit a matching hat: Knit my free ribbed hat pattern in the round on a circular needle or on straight needles (knit flat & seamed down the back).
Table of Contents
Better Magic Loop Technique Video Tutorial
If you get ladders or gaps at the halfway points when knitting rib with magic loop, watch my better magic loop technique tutorial which shows you how to avoid this step by step:

The idea is you bring 4 stitches around from the back tip, so that you have stitches beside each other on both tips at the start of each round. This automatically gives you your natural knitting tension, so your knitting looks the same all the way around – yay!
What You Need
- 4mm (us size 6) 32 inch (80 cm) or longer circular knitting needle to knit the mitts using the magic loop technique. Alternatively, you could use a set of DPNs or a very short circular needle if you prefer.
- 1 small 50g ball of DK or light worsted weight yarn.
- For the larger size mitts, I used 100m approx (nearly 1 50g ball) of Drops Daisy DK merino wool in shade 22 Magenta.
- For the larger size mitts, I used 100m approx (nearly 1 50g ball) of Drops Daisy DK merino wool in shade 22 Magenta.
- Tapestry needle for weaving in ends.
Gauge & Finished Measurements
- Suggested gauge: 28 stitches and 30 rounds to 4 inches (10 cm) in unstretched rib stitch.
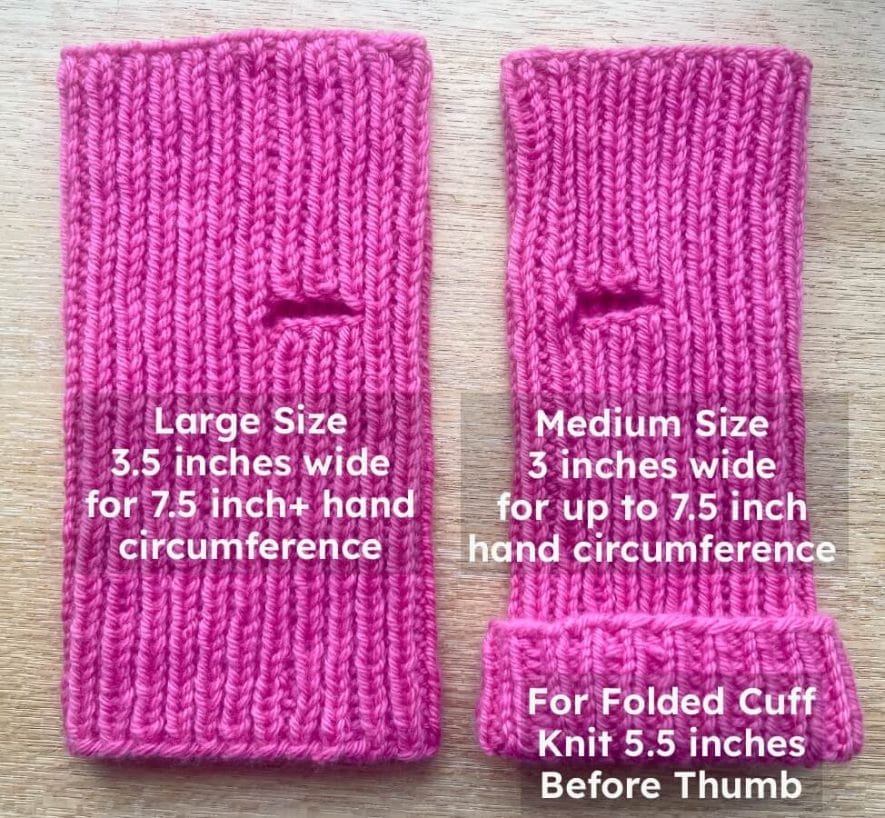
But exact stitch gauge is not important as the mitts are stretchy and the vertical rounds gauge does not matter as you knit to a certain length. The mitt is your swatch, there’s no need for test squares! - My finished mitts measure 7 inches long and roughly 8 cm or 3 inches (medium) / 9 cm or 3.5 inches (large) across unstretched.
Sizing
- 2 sizes: medium, suggested for up to 7.5 inch hand circumference, & large, suggested for 7.5 inch or bigger circumference.
Measure hand circumference by wrapping a tape around your palm below your fingers and inside your thumb. - Because they’re all rib, the mitts are very stretchy so should adjust to fit most adult and teen hands:
- I’ve a 7.5 inch hand and both sizes fit, but I personally prefer the larger size.
- My sister has a 7 inch hand, and both sizes are wearable, but she much prefers the smaller size.
- My partner has an 8.5 inch hand, and both sizes still fit him, but the larger size is much more comfy.
- If your hand is between sizes (roughly 7.5 inches), knit the medium size for a snug mitt and the large for a more relaxed fit.
- If you don’t know the person’s hand circumference, knit the medium size for women and the large size for men.
- Bear in mind the mitts will stretch a bit with wear, especially across the fingers end.
- Mitt length is fully adjustable by knitting more or less rounds at the start and/or end.
Abbreviations
- k1,p1 – alternate between knitting a stitch and purling a stitch to knit 1×1 rib stitch
- (k1,p1) x 3 – alternate between knitting & purling stitches 3 times to knit 6 stitches in 1×1 rib
Ribbed Mitts Knitting Pattern (Knit in the Round)
Cast on 40 (medium) or 48 (large) stitches
I used the long tail cast on (tutorial here), which works well for knitting in the round.
Knit rib stitch for 4 stitches or desired length
Join to knit in the round. See how in my magic loop knitting for beginners video.
Knit 1 stitch, purl 1 stitch and repeat this pattern until the end of the round to do 1×1 rib stitch.
If you get ladders (gaps) running down your halfway points, or other stitch or tension issues, I recommend trying the better magic loop method – video above.
Now just keep knitting rounds of k1,p1 rib stitch until your mitt is 4 inches (10 cm) or your desired length from your wrist/arm to the bottom of your thumb.
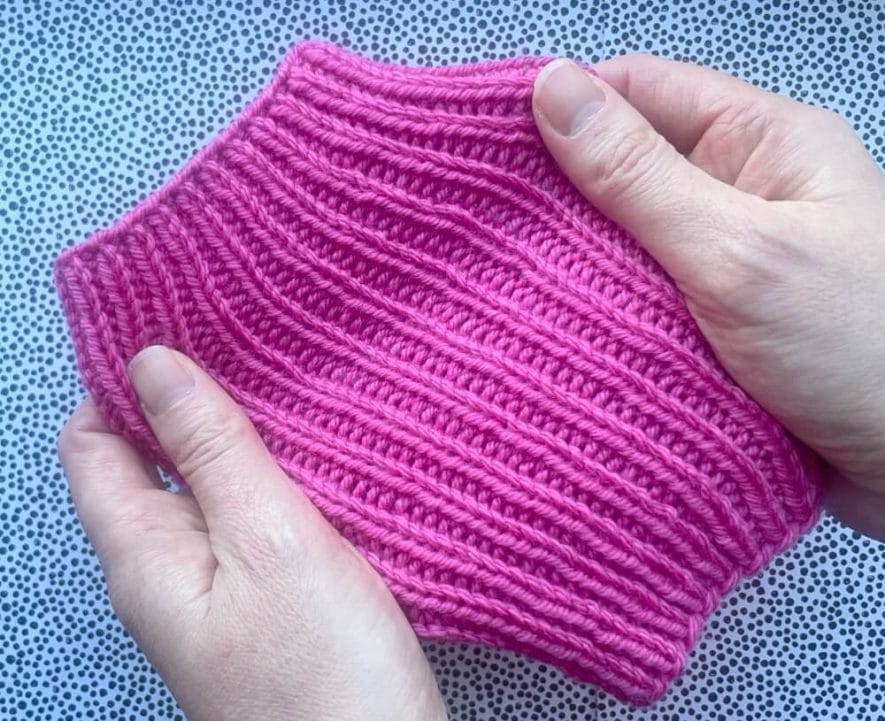
Tip: if your rib looks a bit messy, it may look better on the inside. Just keep knitting and you can turn your mitts inside out at the end for a neater look!
If you want a longer cuff, or to turn up the cuff for a different look, you could knit 5.5 inches instead or whatever length you like.
Ideally, try on the mitt after knitting about 2 inches (5 cm), to check the fit. This is easy to do with magic loop (just move all your stitches to the cable), but if you’re using a short circular or DPNs, you will need to move some stitches temporarily to a spare needle or put them on yarn first to avoid losing stitches when your knitting expands to fit over your hand.
Cast off 6 stitches for thumb hole
On the next round, cast off the 1st 6 stitches to make an opening for the thumb.
I like to cast off in rib so it’s nice and stretchy. Knit the 1st stitch, purl the 2nd & pass the 1st stitch over the 2nd to cast off 1 stitch. Then knit the next stitch & pass the 1st stitch over, purl the next stitch & pass the 1st stitch over & so on. Knit the rest of the round in 1×1 rib as usual.
Better magic loop method note: still bring 4 stitches around from the back needle as usual before you start casting off. So after knitting half a round, on your front tip you will have 4 stitches, then a gap where you cast off 6 stitches, and then more stitches.
Cast on 6 stitches to finish thumb hole

When you reach your cast off stitches gap on the next round, cast on 6 stitches using the backwards loop method with your thumb (video) to make a thumb hole slit. Knit the rest of the round in 1×1 rib as usual.
Better magic loop method note: bring 4 stitches around from the back needle as usual before you start the next round. Then you will rib the next 4 stitches before reaching the cast off stitches gap from the previous round. Cast on 6 stitches at that point.
When you reach your 6 new cast on stitches on the following round, (k1,p1) x 3 to bring them into the 1×1 rib pattern.
Better magic loop method note: after bringing 4 stitches around from the back as usual, you will rib the next 8 stitches & then (k1,p1) x 3 to start ribbing the 6 new cast on stitches.
Knit rib stitch until mitt is 7 inches long or desired length
With the thumb hole slit complete, it’s back to knitting simple rounds of 1×1 rib until your mitt is the desired length.
I knit 7 inch long mitts which is long enough to just cover my pinkie knuckle, but below my other knuckles. The part above the thumb slit measures nearly 2.5 inches or 6 cm.
Ideally try the mitts on the recipient once you’ve knit a couple of inches past the thumb to decide how many more rounds to knit, if any.
You might even like to knit longer mitts, say 8.5 inches, to turn down the top cuff of the mitts for extra warmth or a different look.
Bind off in rib stitch
Once you’re happy with the length, bind off in 1×1 rib so that the top of your mitt is nice and stretchy.
Tip: if your rib looks a bit messy on the outside but neater on the inside, turn your mitt inside out now before binding off. See how at the end of my better magic loop video above. That way you bind off on the right side for a neater finish.
Knit the 1st stitch, purl the 2nd & pass the 1st stitch over the 2nd to cast off 1 stitch. Then knit the next stitch & pass the 1st stitch over, purl the next stitch & pass the 1st stitch over & so on, until you’ve no more stitches left.
Cut your yarn, leaving a good tail, pull it through the remaining stitch to fasten off & weave in both your yarn ends with a tapestry needle.
Washing Tip
The rib stitch makes your mitts go long and skinny when wet. So focus on making them wider and a bit shorter and lay them flat on a raised baking cooling rack or similar to air dry.
This helps them keep their original shape, but some yarns magically spring back once dry anyway if you’re lucky!
Worst case if your mitts go wonky in the wash, it’s easy to fix. Just wash them again, shape how you want and leave to dry.
Knit a Matching Hat

Knit a hat to match your mitts with my free easy ribbed hat pattern, also knit in the round like these mitts, or knit flat with straight needles & seamed down the back.
I hope you enjoy knitting these ribbed mitts. It’s a quick and easy one skein project to practise magic loop while making something pretty and practical. Got any questions or feedback on this pattern? Just leave a comment below.
This free pattern is for personal, non-commercial use only. It may not be copied, sold, translated or distributed in any way, nor any finished items made using it sold, without permission.


")
")