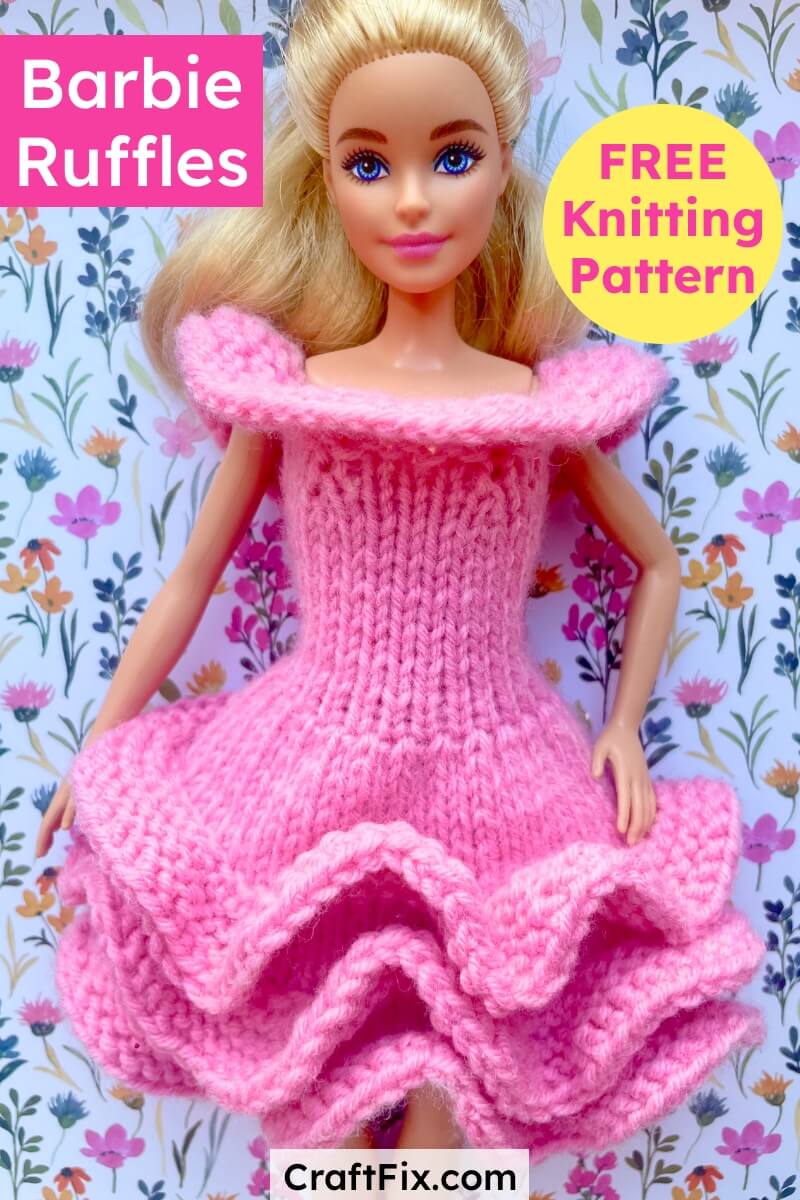

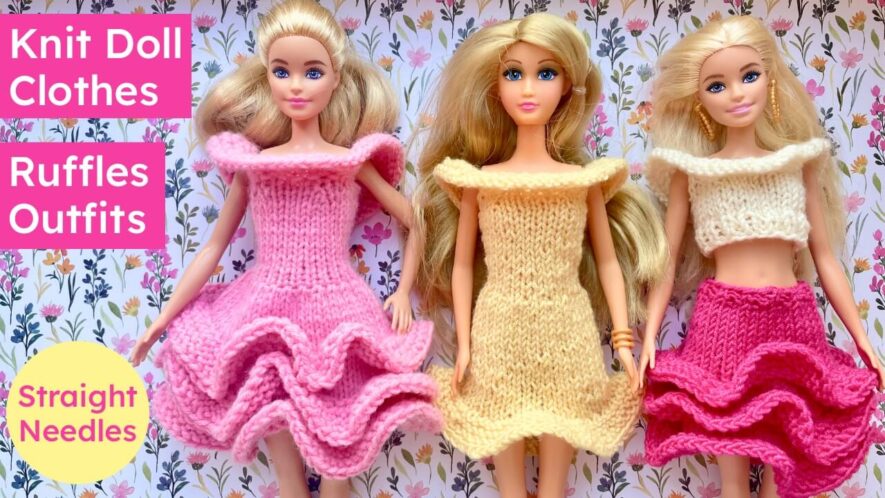
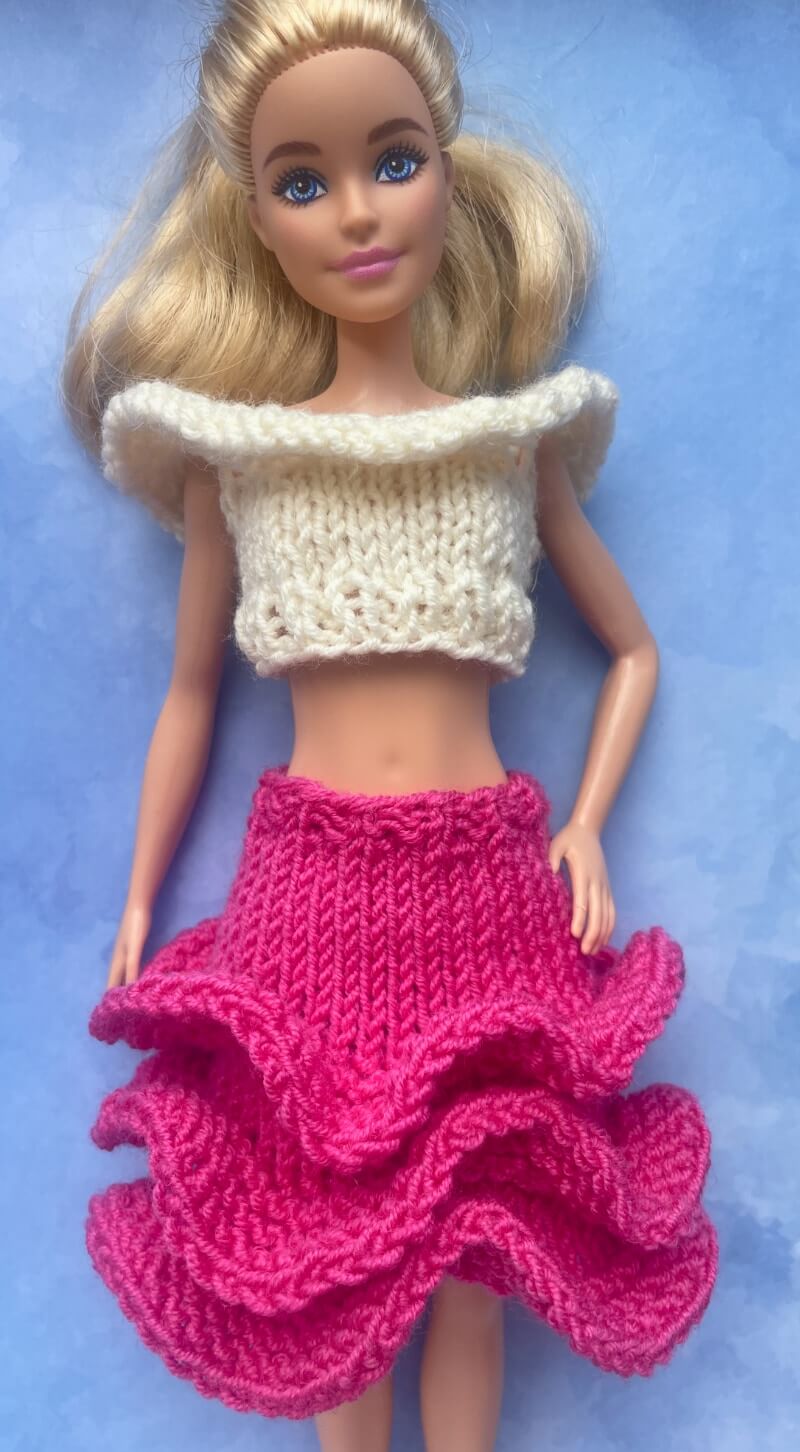
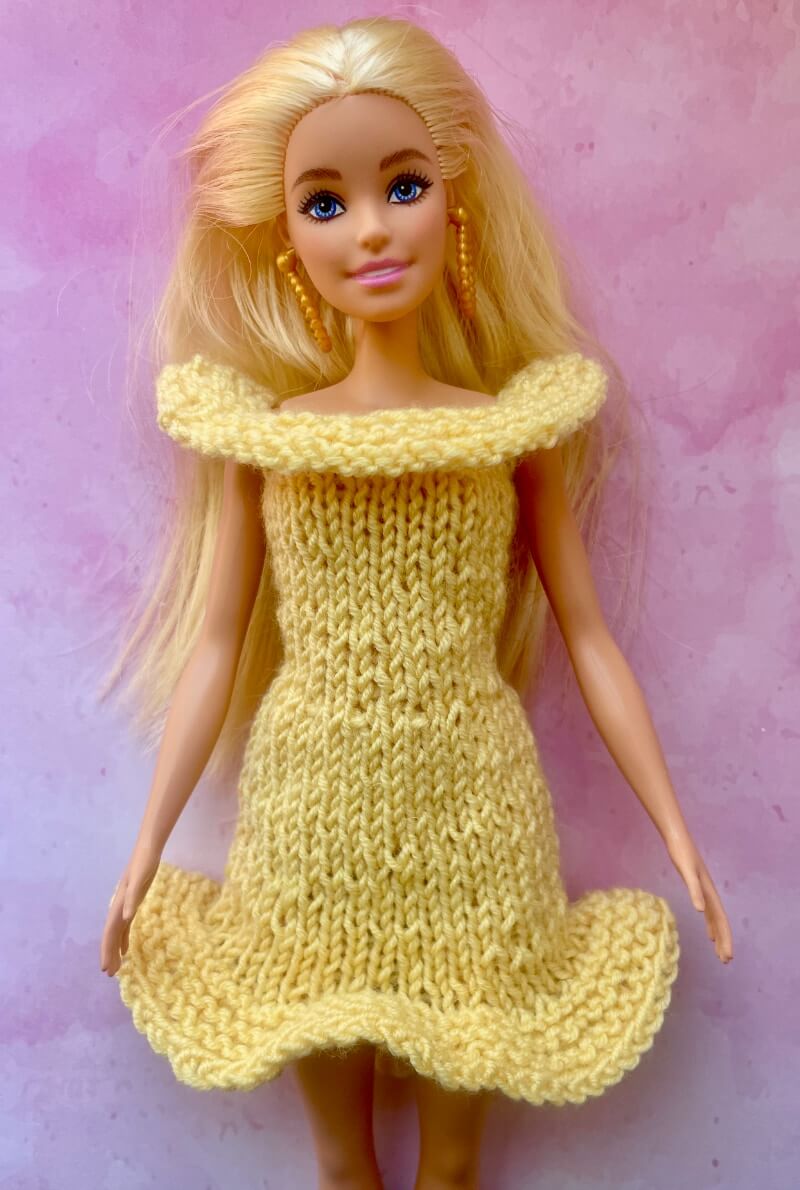
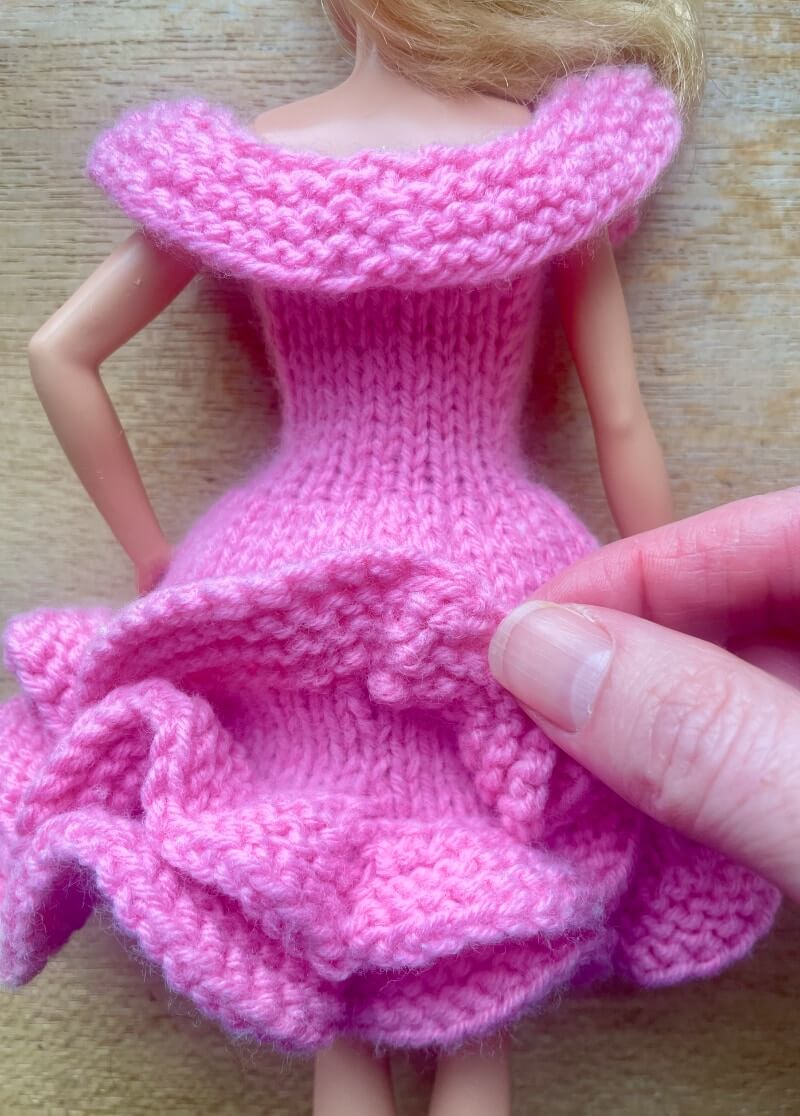
Knit a fancy ruffles skirt, dress & crop top with this easy free knitting pattern. These dolls clothes fit Barbie & other 11.5 inch fashion dolls too.
These doll’s ruffle outfit patterns are also available knit in the round with a circular needle or DPNs – no seaming needed yay!
Table of Contents
What you Need
- 3.25mm (size 3 US) knitting needles
- Sport or 4 ply yarn. Lighter baby DK yarns should work too, but ideally use 3mm needles instead.
I used Drops Baby Merino sport for most samples & Sirdar Snuggly DK (with a 3mm needle) for the pink 3 ruffle dress. - Tapestry needle for seaming, weaving in ends & (optionally) reinforcing armholes.
Yarn amounts (approx): 18m / 5g for crop top, 48m / 14g for bottom ruffle dress, 56m / 17g for 3 ruffle skirt, 88m / 25g for 3 ruffle dress.
Finished measurements: Dress is 12-13 cm (5 in) long approx & 5 cm (2 in) across waist (front)
Tension/gauge is 26 stitches and 39 rows to 10 cm (4 inches) approx, but since doll’s clothes are so small, the best way to judge the size is to try it on/against the doll as you knit, or knit the short crop top first as a test.
All clothes are knit back and forth in rows from the top down and seamed down the back.
Want a Printable PDF Pattern?
All my patterns are free on my blog. But you can buy the Premium PDF Pattern on Etsy or Ravelry:
- Step-by-Step 11 Page PDF with Photos
- Easy Print 3 Page Text Only PDF
- No Ads!
- Priority Pattern Support
- 20% Discount for Newsletter Subscribers - Join Here
Abbreviations
- Rx – row number x
- kx – knit x stitches
- px – purl x stitches
- st st – stockinette stitch: knit the odd (right side) rows and purl the even (wrong side) rows
- m1 – make 1 stitch (increase a stitch) using your preferred increase method
I used M1L: Put your left needle under the bar between the previous & next stitch from front to back, lift it up and place it on the left needle. Then knit into the back of it to make a new stitch. - kfb – increase a stitch by knitting into both the front and back of the next stitch.
- k2tog – knit 2 stitches together to decrease by 1 stitch
- k2tog tbl – knit 2 stitches together through the back loop (only used for binding off ruffles)
- () repeat to end – repeat the instructions inside () until the end of the row
- st – stitches
Barbie Ruffle Crop Top & Dress Knitting Pattern
Ruffle Neckline (Garter Stitch)
Cast on 63 stitches. I used the long tail cast on (guide + video).
R1-4: knit every stitch
Optional: skip R3 & 4 for a narrower ruffle (see white top picture)
R5: (k2tog, k1) repeat to end [42 st]
R6: knit every stitch
R7: (k2tog, k1) repeat to end [28 st]
R8: knit every stitch

Armholes
From R9 on, knit the odd rows (right side) and purl the even rows (wrong side) to knit stockinette stitch.
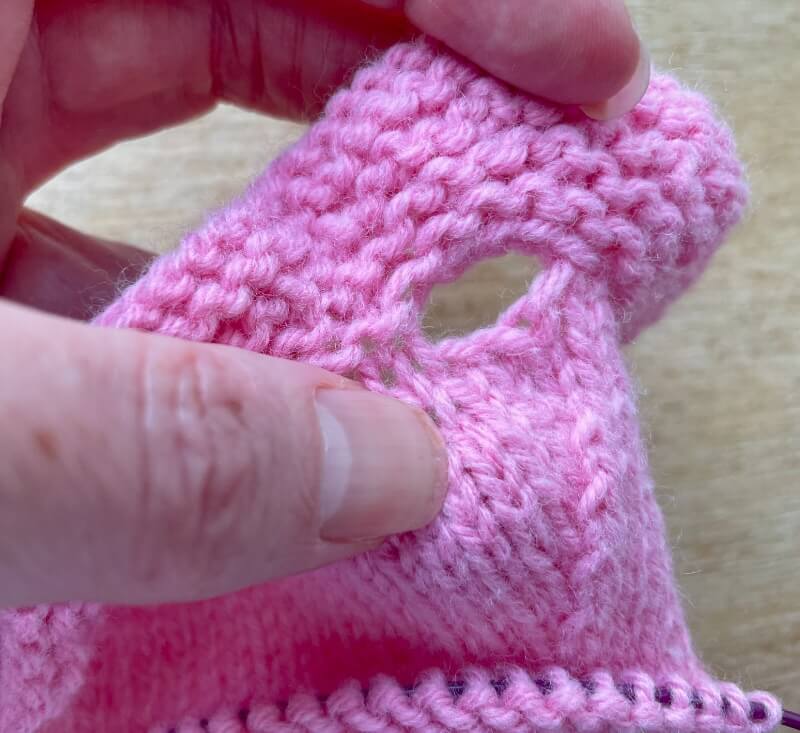
R9: K2, m1, k3. Bind off the next 4 stitches. Start by knitting the next 2 stitches and passing the 1st over the 2nd to cast it off.
Then knit 9 more stitches, so that you have 6 stitches, the bind off gap and 10 more stitches.
Now bind off the next 4 stitches. Again, start by knitting the next 2 stitches, and passing the 1st over the 2nd.
Finally k2, m1, k2.
So you have 6 stitches, a bind off gap, 10 stitches, a bind off gap & 6 stitches [22 st]
R10: p6, cast on 2 stitches using the backwards loop method with your thumb (video), p10, cast on another 2 stitches, p6 [26 st]
Rest of Top
Increases for bust:
R11: k9, m1, k2, m1, k4, m1, k2, m1, k9 [30 st]
R12 & all even rows to R20: purl every stitch
R13: k9, m1, k3, m1, k6, m1, k3, m1, k9 [34 st]
Back decreases for waist:
R15, 17, 19: k5, k2tog, knit until last 7 stitches, k2tog, k5 [28 stitches after R19]
Crop Top Only: Finish with Rib
R21 & R22: (k1,p1) repeat to end to finish crop top with 2 rows of 1×1 rib. Bind off in rib stitch or your chosen method.
To bind off in rib, start by knitting the 1st stitch, purling the 2nd, and passing the 1st stitch over the 2nd. Then knit the 3rd stitch & pass the previous stitch over it, purl the 4th stitch etc.
Dress Only: Rest of Pattern
R21: k5, k2tog, knit until last 7 stitches, k2tog, k5 [26 stitches]
R22-26: starting & ending with a purl row, do 5 rounds of stockinette at 26 stitches for waist.
Then follow skirt pattern from R3 onwards (starting with kfb increases) to knit the skirt.
Barbie Ruffle Skirt Knitting Pattern
Cast on 26 stitches. I used the long tail cast on (guide + video).
R1 & R2: (k1,p1) repeat to end to start the skirt with 2 rows of 1×1 rib
R3: k2, (kfb, k1) repeat to end [38 st]
Option 1: Plain Skirt with Bottom Ruffle
R4-28: starting and ending with a purl row, do 25 rows of stockinette.
Knit fewer or more rows here to adjust the skirt length. The bottom ruffle will add about half an inch.
Proceed to Bottom Ruffle instructions.
Option 2: Multi Ruffle Skirt
The purl rows on the right side are where the ruffles will go, so you can alter the placement by simply do more or fewer rows of stockinette between these purl rows. You can also add more ruffles by just knitting more repeats.
R4-12: starting and ending with a purl row, do 9 rows of st st.
R13: purl 1 row on the right side.
R14-20: starting and ending with a purl row, do 7 rows of st st.
R21-28: repeat R13-20 once more for a 3 ruffle skirt (including bottom ruffle) or more times for more ruffles.
Bottom Ruffle (Knit for Both Options)
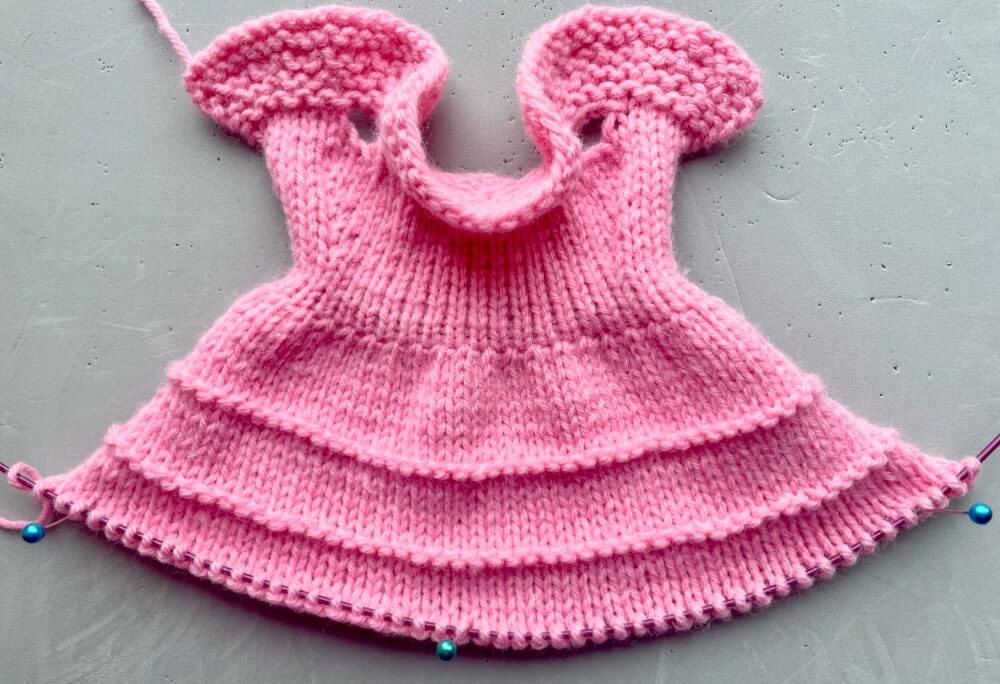
R29 or Ruffle R1: k2, (kfb) repeat to last 2 stitches, k2 to nearly double your stitches [72 st]
Now simply knit 5 rows to knit a garter stitch ruffle:
Ruffle R2-6: knit every stitch
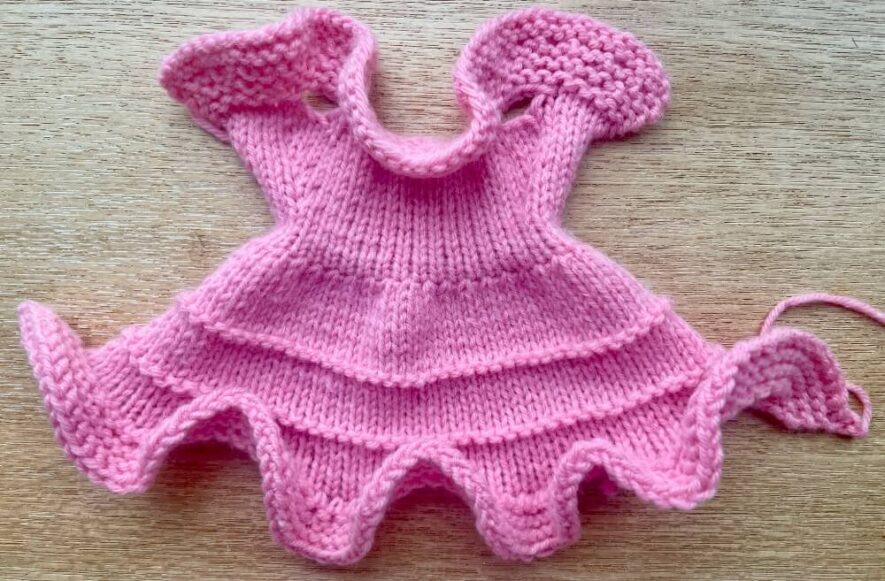
Bind off using the stretchy k2tog tbl method (video). Start by knitting the 1st 2 stitches. Then put your left tip into the front of those 2 stitches on the right tip & knit them together through the back loop. *Knit the next stitch and put your left tip into the front of the first 2 stitches on your right tip and knit those together through the back loop*. Repeat from * until all your stitches are cast off.
Option 2 Only: Add Other Ruffles
With the skirt the right way up (ruffle at bottom) and skipping the first and last stitch (the seam allowance), pick up and knit stitches in the purl row above the last ruffle. Video demo coming soon!
Purl stitches are made up of u and n shapes (aka smiles and frowns). Put your needle into each n shape, skipping the first and last (which will end up inside the back seam). Wrap your yarn around to pick up and knit a stitch in each purl stitch. [36 st]
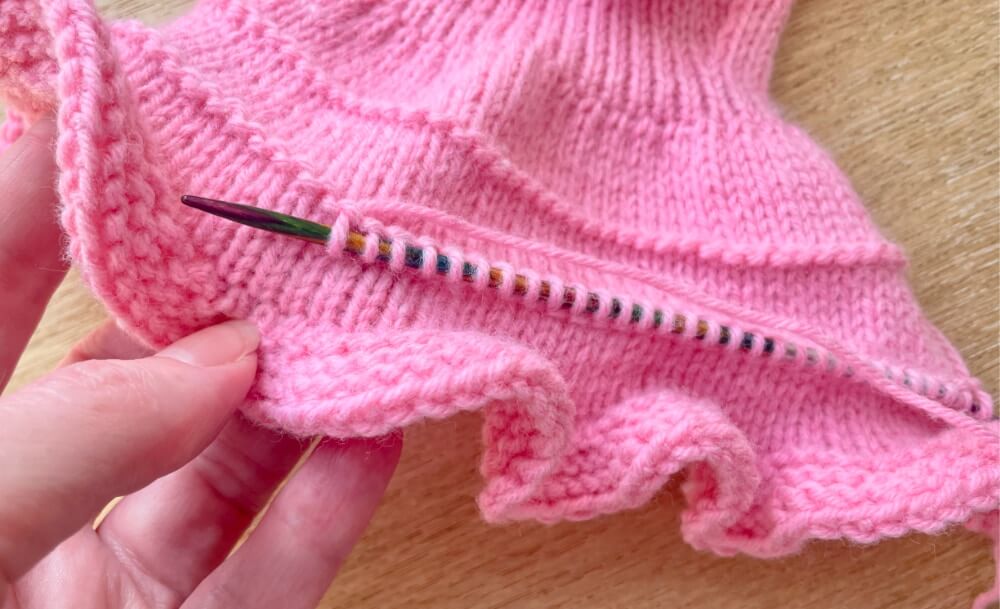
Now turn your skirt upside down to knit the next row:
Ruffle R1: (kfb) in every stitch to double the number of stitches [72 st]
Ruffle R2-6: knit every stitch (5 rows of garter stitch matching the bottom ruffle).
Note that your skirt will be the right way up knitting the even rows, and the wrong way up knitting the odd rows.
Finally, with the skirt upside down, bind off using the k2tog tbl method (see bottom ruffle instructions).
Repeat this process again for the top ruffle (and any extra ruffles you added).
Seaming & Finishing
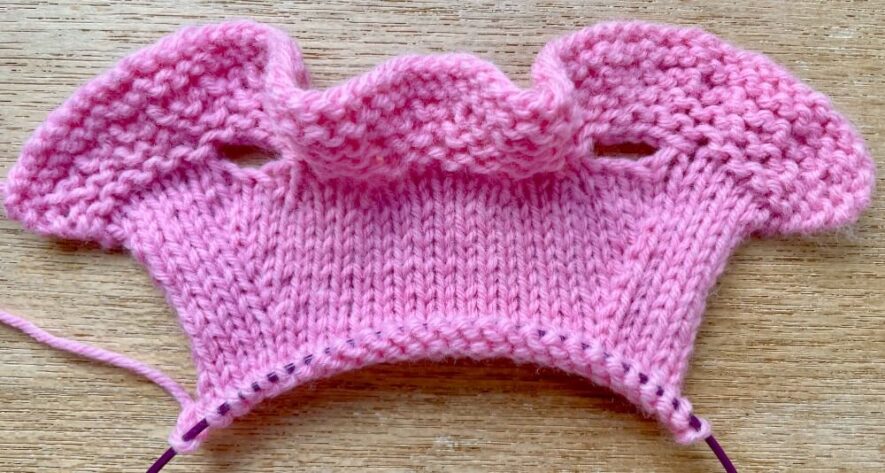
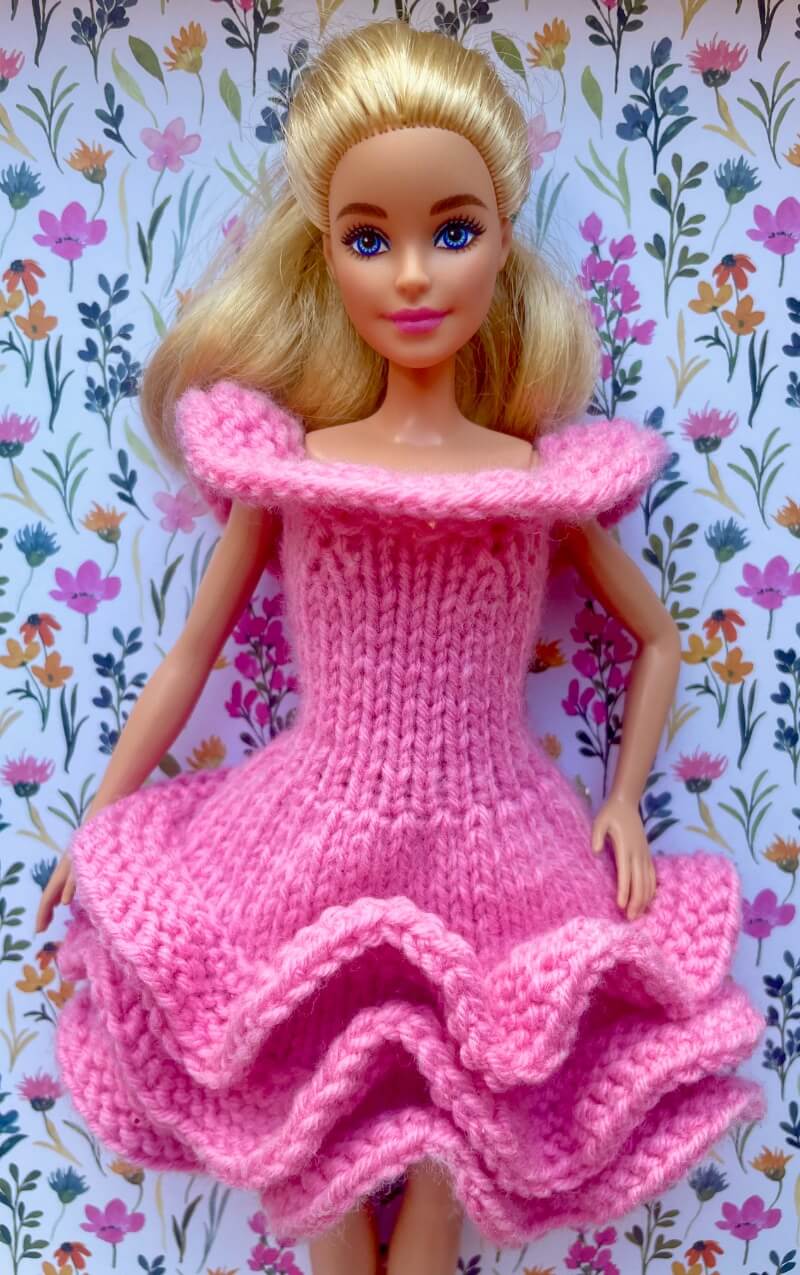
First, forget about the ruffles and seam the stockinette parts of the back of the dress, top or skirt using mattress stitch for a neat finish, working 1 stitch in on each side. See my mattress stitch guide & video tutorial here.
Then, flat seam the garter stitch ruffles (both neck and skirt). With the right side of the ruffle facing you (turn the neck ruffle down over the seamed back of the top/dress), line up the left and right ruffle edges.
Garter stitches are made up of u and n shapes, so try to work in to u shapes at 1 edge and n shapes on the other to connect your 2 garter stitch pieces neatly with a seam that lays fairly flat, instead of the bulkier seam mattress stitch leaves on the inside. Video coming soon!
Weave in all yarn ends using a tapestry needle.
Reinforce Armholes (optional)
The underside of the armholes is a bit delicate and sharp doll fingers can get caught there.
You can make the armholes more robust by threading your tapestry needle with a length of yarn and adding a few vertical stitches over the bottom side of the armhole (overstitching).
I’ve shown this overstitching in a contrast pink colour on the left below so you can see the stitches made. When you use matching yarn (right) you won’t see it at all:


Washing & Blocking
Most pieces should be ready to wear straight off the needles but you may need to block the skirt/dress with just a bottom ruffle so Barbie looks her best:
- Step 1: Soak it in a bowl of cool water for about half an hour (add a drop of wool wash if you like)
- Step 2: Gently squeeze out the excess water (pressing it inside a towel helps)
- Step 3: Lay the dress out neatly on a baking rack or similar and when you’re happy with the shape, leave it to dry
Want a Printable PDF Pattern?
All my patterns are free on my blog. But you can buy the Premium PDF Pattern on Etsy or Ravelry:
- Step-by-Step 11 Page PDF with Photos
- Easy Print 3 Page Text Only PDF
- No Ads!
- Priority Pattern Support
- 20% Discount for Newsletter Subscribers - Join Here
I hope you enjoy knitting cute ruffle outfits for your dolls and find the patterns easy to follow.
Got any questions or feedback? Please leave a comment below.
This 11.5 inch fashion doll clothes pattern is for personal, non-commercial use only. It may not be copied, sold, translated or distributed in any way without permission. While it also fits Barbie dolls, it’s not associated with Mattel in any way – I’m just a big Barbie fan. 😊