Craft Fix is reader-supported. If you choose to buy via certain links I could earn a small commission at no cost to you more
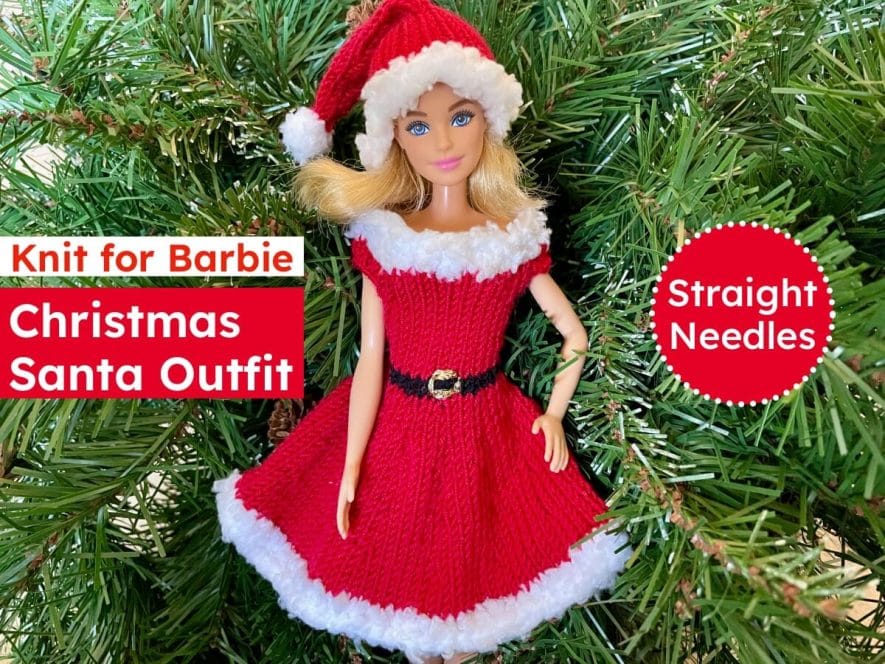
Knit Barbie a cute Christmas outfit with this free pattern. Knit back and forth in rows of easy stockinette – with a fluffy garter trim – it fits all 11.5 inch fashion dolls.
3.25mm (size 3 US) knitting needles & thicker 4mm (size 6 US) approx needles for the fluffy trim.
53m / 58 yds / 15g approx Red sport or 4 ply yarn (or light baby DK yarns should work) and a small scrap of black for the belt. I used Drops Baby Merino wool in shade 16 red.
Small amount of white “teddy” fleece style yarn for the fluffy trim. I used Sirdar Snowflake Chunky in shade Milky 200 with size 4mm knitting needles. Rico Baby Teddy Aran (UK/Europe) is similar and if you’re in the US Bernat Pipsqueak could work. Here’s a list of similar fluffy yarns on YarnSub. Any weight from DK to chunky/bulky should work, but you may need to adjust your needle size for the trim to knit comfortably. I used 4mm needles as a guide, but use what works for you.
Gold yarn / thread / embroidery floss for the belt buckle. I used Ricorumi Lamé fine DK.
Tapestry needle for seaming, embroidering the belt buckle & weaving in ends.
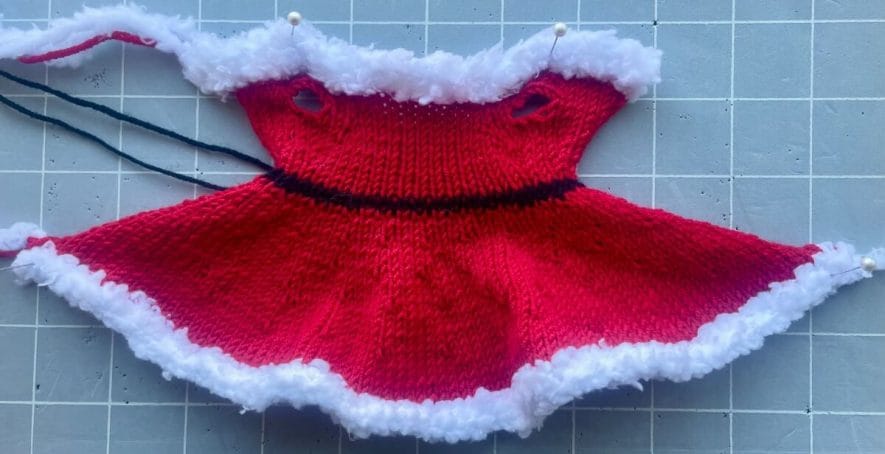
Finished dress measurements: 13.5cm / 5.25 inches long approx & 5cm (2 in) across waist (front)
Tension/gauge is 26 stitches and 39 rows to 10 cm (4 inches) approx, but since doll’s clothes are so small, the best way to judge the size is to try the top on the doll after you knit the armholes.
TIP: if you’re concerned about sizing, you could also knit my Barbie crop top pattern first, as it’s only 15 rows to knit and the same shape as this dress pattern.
Want a Printable PDF Pattern?
All my patterns are free on my blog. But you can buy the Premium PDF Pattern on Etsy or Ravelry:
m1 – make 1 stitch (increase a stitch) using your preferred increase method I used M1L: Put your left needle under the bar between the previous & next stitch from front to back, lift it up and place it on the left needle. Then knit into the back of it to make a new stitch.
kfb – knit into the front and then the back of the next stitch to increase by 1 stitch (only used for hat bobble)
k2tog – knit 2 stitches together to decrease by 1 stitch
ssk – slip slip knit: decrease 1 stitch by slipping the next stitch as if to knit, then slipping the next stitch as if to purl & finally knit both slipped stitches through the back loop (only used for hat)
st st – stockinette stitch: knit the right side rows and purl the wrong side rows
() x n times – repeat the instructions within () n times
Barbie Doll Christmas Dress Knitting Pattern
This doll dress is knit back and forth in rows from the top down and seamed down the back. There are increases & decreases for shaping, but if you go wrong the odd time, Barbie won’t mind! 😊
Fluffy Neck
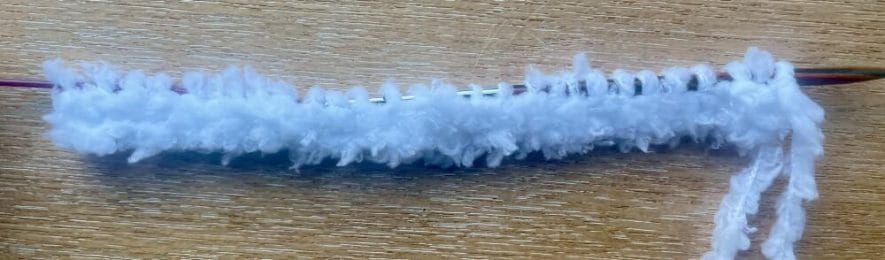
With 4mm needles & white fluffy yarn, cast on 26 stitches. R1 & 2: knit all stitches.
Just knit 2 rows of garter stitch to make the fluffy neckline
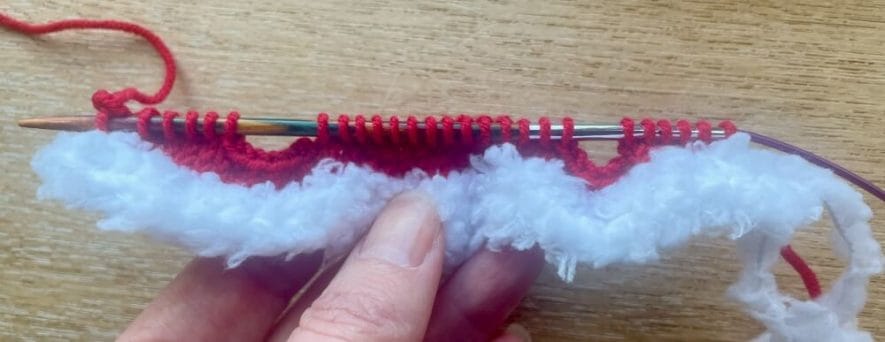
Cap Sleeves
Switch to main red yarn & 3.25mm needles. R3: k2, m1, k2, m1, k5, m1, k8, m1, k5, m1, k2, m1, k2 [32 st] R4 and all even rows from now on unless stated: purl all stitches
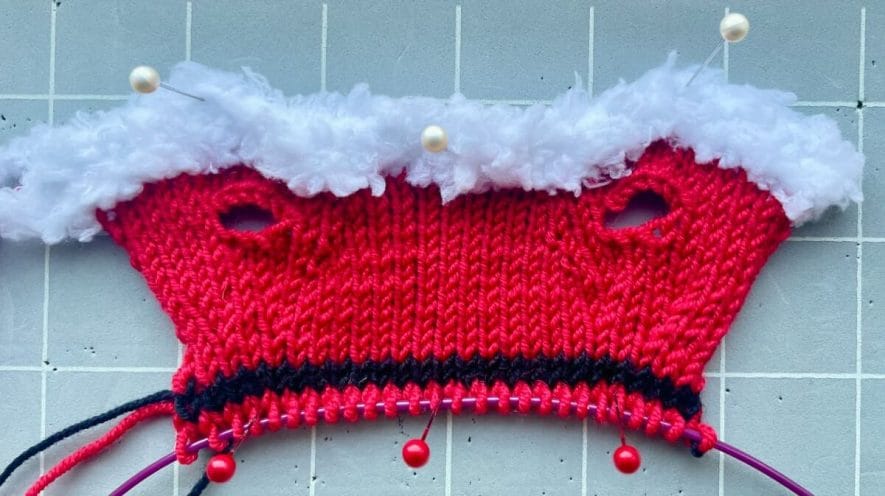
R7: k6. Cast off the next 6 stitches. Start by knitting stitches 7 & 8 and pass stitch 7 over 8 to cast it off. Knit 13 more stitches, so that you have 6 stitches, the cast off gap and 14 more stitches. Now cast off the next 6 stitches. Again, start by knitting the next 2 stitches, and passing the 1st over the 2nd. Finally knit the last 5 stitches. So you have 6 stitches, a cast off gap, 14 stitches, a cast off gap & 6 stitches [26 st]
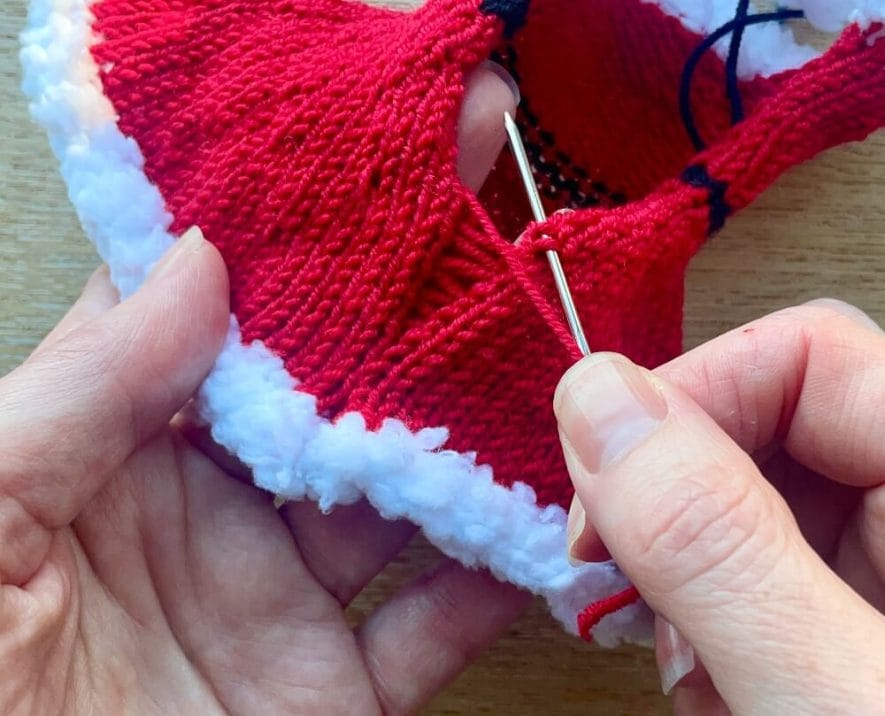
Use mattress stitch to seam the dress at the back for a super neat finish
Blocking
You may need to block your dress to stop the fluffy trim from curling up, and this also helps smooth out the skirt increases and give the dress a softer finish. It’s a little extra work, but it is Christmas after all! 🙂
Step 1:Soak it in a bowl of cool water for 20 minutes (or just give it a good rinse if you’re in a rush!)
Step 2: Gently squeeze out the excess water (wrapping it inside a towel & pushing down firmly with both hands helps)
Step 3: Lay out on a baking rack or similar and when you’re happy with the shape, leave it to dry
Add the Belt Buckle
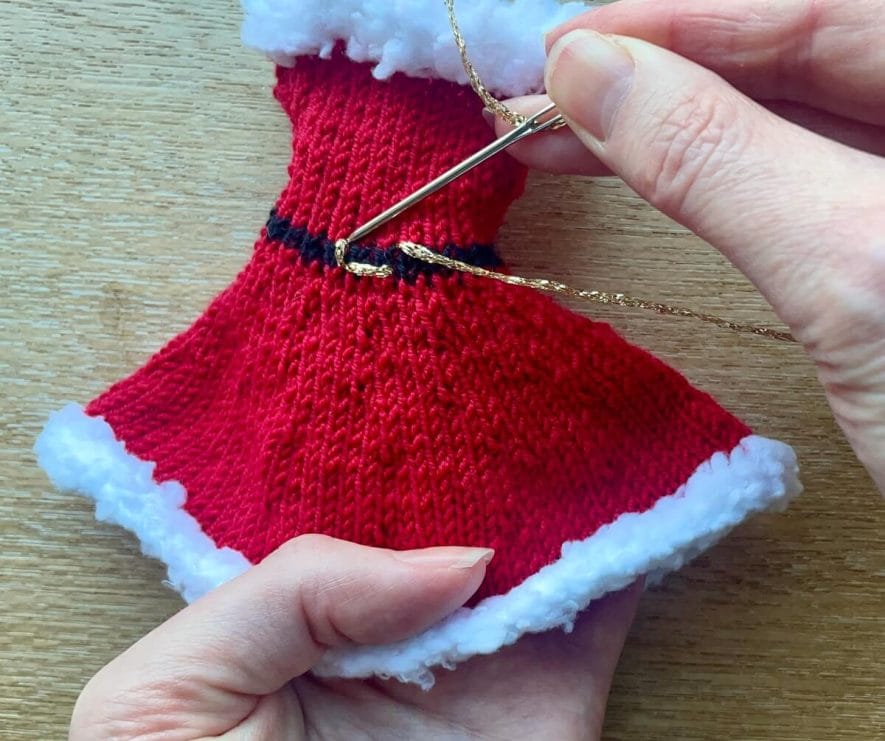
Find the centre of the belt at the front of the dress and using gold yarn or thread, embroider a rectangle for the buckle as follows:
Make a horizontal line 2 knit stitches wide along the bottom of the belt.
Make a short vertical line up to the top of belt.
Matching the horizontal line across the bottom, make a line 2 knit stitches wide across the top of the belt.
Make a short vertical line on the other side of the belt to complete the rectangle.
I like to repeat steps 1-4, adding a 2nd layer of gold stitches so the buckle stands out.
Cut your thread and weave in both ends on the inside of the dress.
Embroider a gold rectangle (2 knit stitches wide & belt height) for the buckle
Reinforce Armholes (optional)
The underside of the armholes is a bit delicate and sharp doll fingers can get caught there.
You can make the armholes more robust by threading your tapestry needle with a length of yarn and adding a few vertical stitches over the bottom side of the armhole (overstitching).
I’ve shown this overstitching in a contrast pink colour on a white dress below so you can see the stitches made. When you use matching yarn (right) you won’t see it at all:
Bottom of armhole overstitched in contrast colour to demo
Barbie Doll Santa Hat Knitting Pattern
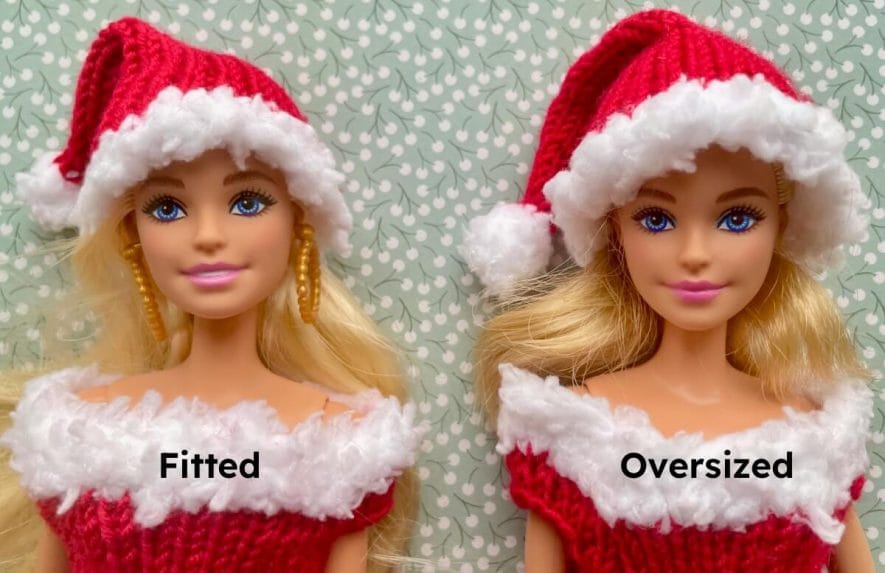
The hat is knit from the bottom up. I’ve included 2 pattern sizes – a fitted hat and another larger hat, handy for dolls with big hair or if you prefer a more oversized look.
With 4mm needles & white fluffy yarn, cast on 22 stitches for a fitted hat and 26 stitches for an oversized hat. R1: knit all stitches.
Switch to red yarn & 3.25mm needles. R2-14: starting with a purl row, knit 13 rows of stockinette (purl even rows & knit odd)
R15: k2, k2tog, knit to last 4 stitches, ssk, k2 (decrease by 2 stitches) R16: purl all stitches
Repeat the last 2 rows until you have 10 stitches left, ending with a purl row.That’s 5 more times for a fitted hat or 7 more times for an oversized hat.
Oversized Hat Bobble Only: R2: k2, Kfb x 2, k2 [8 st] R3-4: knit all stitches
The finished flat knitted Santa hat piece (note: this earlier pattern version had decreases at the sides rather than the back of the hat)
Cut the yarn leaving a long tail, thread it through the remaining [6,8] stitches & pull to close the bobble.
Join the side edges of the bobble by weaving the fluffy ends through both sides & then pass them through the bobble until you’re happy with a fluffy round shape.
Finishing
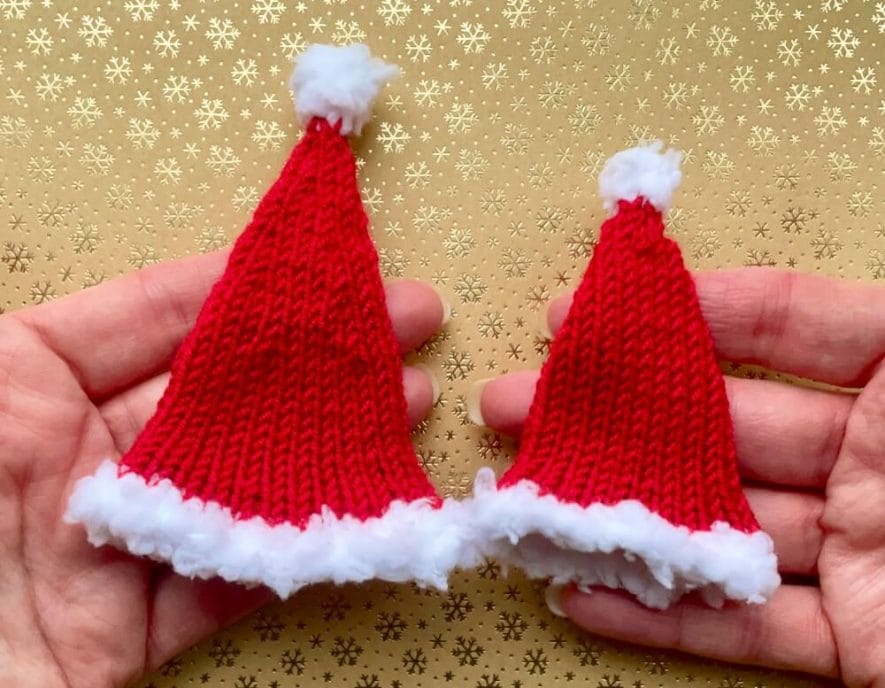
Both Santa hat sizes are small enough to hold in your hand. The oversized hat is 11cm long & 6cm across the red base while the fitted hat is 9cm long and 5cm across the bottom of the red.
Wetting & drying the hat helps soften it & can make it slightly bigger – follow the dress blocking instructions above.
The santa hat doesn’t really stay put in you fold it down – the bobble sticks out a bit! If that bothers you, just decide on your final position & attach the folded part of the hat to the crown with a couple of stitches to keep it in place.
Merry Christmas from me & my Barbie 🙂 (oversized hat shown in pic)
Get the Premium PDF Pattern
All my patterns are free on my blog. But you can buy the Premium PDF Pattern on Etsy or Ravelry:
I hope you enjoy knitting this cute doll’s Christmas Santa outfit and find the pattern easy to follow. Got any questions or feedback? Please leave a comment below.
This 11.5 inch fashion doll’s knitting pattern is for personal, non-commercial use only. It may not be copied, sold, translated or distributed in any way without permission.While it also fits Barbie dolls, it’s not associated with Mattel in any way – I’m just a big Barbie fan. 😊


")
")