

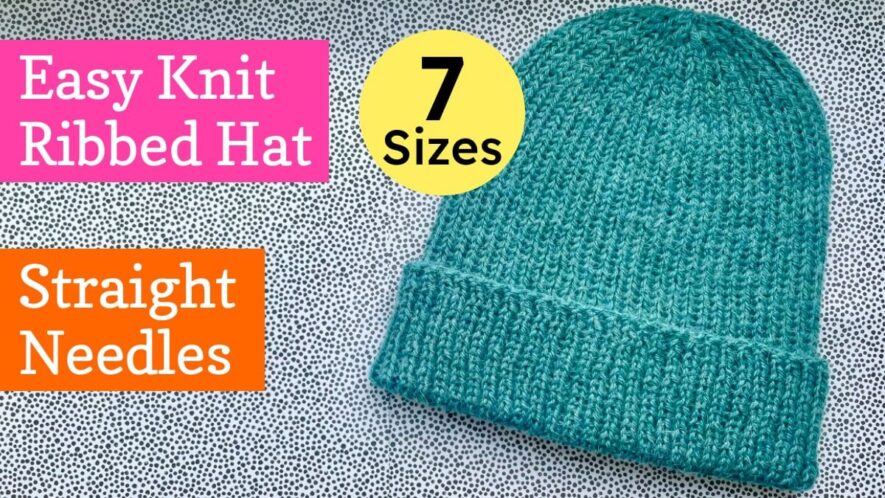
This free hat knitting pattern is all 1×1 rib for a great fit and an easy knit. It comes in 7 sizes from newborn baby to XL adult, so you can knit matching hats for all the family.
Knit as a flat piece, back and forth in rows, you can make this hat with 2 straight needles. There’s simple decreases near the end to shape the crown. Just seam the sides together at the end for a stylish hat with a nearly invisible seam down the back.
This pattern is also available for circular needles or DPNs, knit seamlessly in the round so it’s reversible – yay!
Table of Contents
What You Need
- 4mm (us size 6) knitting needles.
- DK / 8 ply / light weight yarn: 1 small 50g ball for baby sizes or 2 balls for a child or adult size hat.
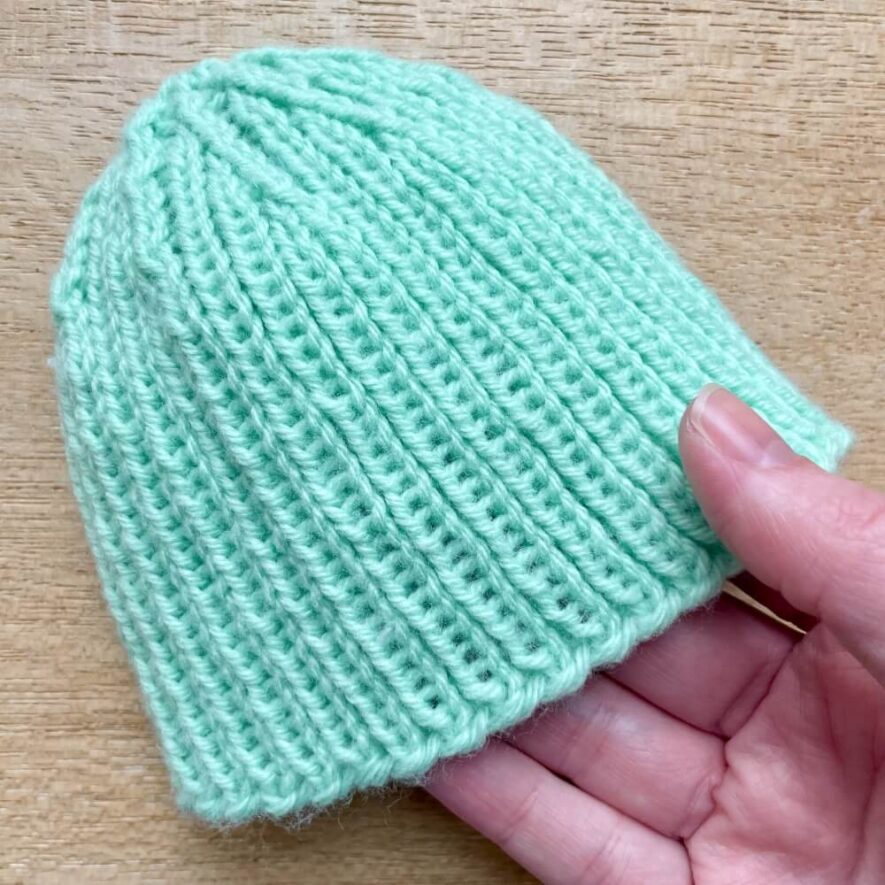
- For the mint newborn hat with no turn-up, I used 57m / 17g approx of Sirdar Snuggly DK baby yarn.
- For the pink adult hat (size 6) I used 187m / 85g approx of Drops Daisy DK merino wool in shade 22 Magenta.
- For the teal adult hat (size 6) I used 160m / 80g approx of Drops Lima, a heavy DK (or lighter worsted) wool & alpaca mix in shade 9018 sea green.
- Tapestry needle for seaming the hat & weaving in ends.
Sizing
- Suggested gauge: 27 stitches and 28 rows to 4 inches (10 cm) in unstretched rib stitch.
But exact stitch gauge is not important as the hat is stretchy & the vertical rows gauge does not matter. The hat is your swatch, there’s no need for test squares! - The pattern includes 2 options: (A) a shorter fitted hat with no turn up and (B) a longer cuffed hat with a turn up (or extra slouchy when turned down).
- The hat height is fully adjustable. Just knit more or fewer rows of rib depending on your head height, how deep a brim or how much slouch you want
| Size Number | 1 | 2 | 3 | 4 | 5 | 6 | 7 |
|---|---|---|---|---|---|---|---|
| Age / Size | Newborn | 3-6 mth | 6-12 mth | Toddler | Child | Adult | XL |
| Head Circumference | 14 | 16 | 18 | 19 | 20.5 | 22 | 25 |
| Option A: Fitted Height with No Turn Up | 5 | 6 | 7 | 7.5 | 8 | 9 | 10 |
| Option B: Height with Turn Up / Slouch | 6.25 | 7.5 | 8.75 | 9.25 | 10 | 11.5 | 12.5 |
| Approx hat width (seamed, unstretched, post wash) | 5.5 | 6.25 | 7 | 7.75 | 8.25 | 9 | 10.25 |

Abbreviations
- Rx – row number x
- kx – knit next x stitches
- px – purl next x stitches
- ssk – slip slip knit decrease method (SSK video tutorial):
1. Slip the 1st stitch to the right tip as if you were going to knit it,
2. Slip the 2nd stitch to the right tip as if you were going to purl it,
3. Insert your left tip from left to right into both stitches on the right tip and knit them through the back loop. - () or [] x (9,10,11,12,13,14,16) times – repeat the instructions inside () or [] 9-16 times depending on the size you’re making (9 times for a newborn, 13 times for child, 16 times for XL etc)
- [1,2,3,4,5,6,7] stitches – the number of stitches left after that round for each size
DK Ribbed Hat Knitting Pattern for Straight Needles (Knit Flat)

Cast On
Cast on [74 newborn, 82 3-6 mths, 90 6-12 mths, 98 toddler, 106 child, 114 adult, 122 XL] stitches.
I used the long tail cast on (tutorial here) but you can use any cast on.
Knit Rib Stitch until Desired Length
Knit 1 stitch, purl 1 stitch and repeat this pattern until the end of the row to do 1×1 rib stitch.
Now just keep knitting rows of k1,p1 rib stitch until your hat is 1.75 inches shorter than your desired hat height, ending on a wrong side row.
Here are suggested rib amounts in inches for each size, but feel free to adjust to suit:
Option A – Fitted Hat with No Turn Up:
Newborn 3.25, 3-6 mths 4.25, 6-12 mths 5.25, toddler 5.75, child 6.25, adult 7.25 & XL 8.25 inches.
Option B – Hat with Turn Up or Slouch:
Newborn 4.5, 3-6 mths 5.75, 6-12 mths 7, toddler 7.75, child 8.25, adult 9.75 & XL 10.75 inches.
If you knit the suggested rib height, your finished hat height will match the pattern sizing table at the top.
Crown Decreases

Picture above shows an adult hat (size 6) after the final row with 15 stitches left
From now on you work in pairs of rows:
In row 1 (right side), you do a SSK every so often instead of rib stitch, to decrease by (9,10,11,12,13,14,16) stitches depending on the size you’re making.
In row 2 (wrong side), there’s no decreases, but sometimes you will have 2 purl stitches in a row instead of 1×1 rib. Just go with it and knit all the knit stitches & purl all the purls. Don’t overthink it!
1st Decreases:
R1: K1, P1, [SSK, (K1, P1) x 3] x (9,10,11,12,13,14,16) times to decrease (9,10,11,12,13,14,16) stitches evenly around [65, 72, 79, 86, 93, 100, 114 stitches]
R2: [(K1, P1) x 2, K1, P2] x 14 times, K1, P1
Explanation: After the 1st 2 stitches, work in blocks of 8 stitches. Do a SSK with the 1st 2 stitches (to decrease a stitch) and then keep the rib stitch pattern for the other 6 as usual.
Then knit 1 row even. Instead of all 1×1 rib, you will now have 2 purl stitches in a row wherever you did the SSKs. Just stay in this new pattern: knit all the knit stitches & purl all the purls.
2nd Decreases: SSK every time you have 2 knit stitches in a row
R3: K1, P1, (SSK, P1, K1, P1, K1, P1) x (9,10,11,12,13,14,16) times [56, 62, 68, 74, 80, 86, 98 stitches]
R4: (K1, P1) rib stitch
Explanation: After the 1st 2 stitches, you’re now working in blocks of 7. Whenever you come to 2 knit stitches in a row, you SSK them. Otherwise it’s just rib stitch as usual (purl the purls & knit the knit stitches).
You’re back in standard 1×1 rib stitch after this decrease row, so just do an even row of rib.
3rd Decreases:
R5: K1, P1, [SSK, (K1, P1) x 2 ] x (9,10,11,12,13,14,16) times (work in blocks of 6) [47, 52, 57, 62, 67, 72, 82 stitches]
R6: [K1, P1, K1, P2] x 14 times, K1, P1 (just knit the knit stitches & purl the purls)
4th Decreases: SSK every time you have 2 knit stitches in a row
R7: K1, P1, (SSK, P1, K1, P1) x (9,10,11,12,13,14,16) times (work in blocks of 5) [38, 42, 46, 50, 54, 58, 66 stitches]
R8: K1, P1 rib stitch
5th Decreases:
R9: K1, P1, (SSK, K1, P1) x (9,10,11,12,13,14,16) times (work in blocks of 4) [29, 32, 35, 38, 41, 44, 50 stitches]
R10: (K1, P2) x 14 times, K1, P1
6th Decreases:
R11: K1, P1, (SSK, P1) x (9,10,11,12,13,14,16) times (work in blocks of 3) [20, 22, 24, 26, 28, 30, 34 stitches]
R12: K1, P1 rib stitch
Final Row:
R13: SSK x (10,11,12,13,14,15,17) times [10,11,12,13,14,15,17 stitches left]
Seam the back of the hat

See my hat finishing tutorial (including 5 min video) here →
Leaving a long tail, cut the yarn. Thread it through the 15 remaining stitches 2-3 times & gather to close the top of the hat.
Next, working from the top point down, you need to join the left and right edges of your flat knitted piece together to turn it into a hat with a seam down the back. Use mattress stitch to make an invisible seam for a neat finish.
Seam under purl stitches on both sides. Your edge stitch is a purl stitch on one side and a knit stitch on the other. So seam into the edge stitch on the purl side, and work 1 stitch in on the other (skipping the first knit stitch column). Watch the video tutorial below to see how to do this step by step.
The one downside with knitting a hat flat with straight needles is there’s a visible bumpy seam on the inside. So it’s not reversible and therefore you need to decide whether you will mainly wear the hat turned up or down before you seam the bottom.
If you want a slouchy hat you will mainly wear turned down, keep seaming the hat on the outside (right side out) all the way to the bottom.
But if you want to turn the brim on the hat up, decide how much of a brim you want and mark the bottom edges with the bottom turned up this amount. So you mark where the bottom of the hat will be when it’s worn.
The inside of the hat will be seen at the back from this point down. So when you reach this part of the seam, turn the hat inside out and start seaming on the inside (wrong side) from here on.
This way, when you turn the brim up, you won’t be able to see any seam at the back because the seam bulk will be hidden on the inside of the brim.


How to Seam a Ribbed Hat with Mattress Stitch
Watch this short 5 minute video tutorial to see how to invisibly seam your ribbed hat. Or if you prefer written instructions, follow my step by step guide here.

Washing Tips
Wash your hat following the instructions on your yarn ball band. If in doubt, hand wash it in a tub of cool water, adding some wool wash if you have it. I love Soak wool wash – a bottle lasts me years!
If machine washing, make sure you use the wool or delicates cycle at a low temperature with a low spin speed so your hat doesn’t felt or go all stiff.
The rib stitch and length of the hat makes it go long and skinny when wet. So I focus on making it wider and a bit shorter and lay it flat on a raised baking cooling rack to air dry.
This helps it keep its original shape, but some yarns magically spring back once dry anyway if you’re lucky!
I hope you enjoy knitting this ribbed hat. It’s a nice easy project to make a cute and cosy hat for yourself or a special gift. Got any questions or feedback on this pattern? Just leave a comment below.
This free pattern is for personal, non-commercial use only. It may not be copied, sold, translated or distributed in any way, nor any finished items made using it sold, without permission.


Thank you for this pattern, I found it useful and it created a nice hat.
However, there is an error on the 2nd set of decreases. For R3 it says the pattern is
K1, P1, (SSK, P1, K1, P1) x 14 times [86 stitches] and that you are working in rounds of 7. However, the pattern says (SSK, P1, K1, P1) which is only a round of 5. I believe the actual pattern is K1, P1, (SSK, P1, K1, P1, K1, P1) x 14 times which adds up to 100 stitches which is how many you should have at the start of R3. Just wanted to flag it in case anyone gets confused like I did.
Thanks again for the pattern. As a beginner (which this tutorial is aimed at), I would have enjoyed more video tutorials that actually showed you creating this specific project. Some of the videos you link to for instructions are not directly applicable to the specific project, such as the video showing the finishing of the hat but it is being knit on circular needles, which I found difficult to translate the instructions to my project.
Yikes! Thank you SO much Abi for spotting the pattern typo and I’m very sorry for the hassle. The original circular version of the pattern was correct, but this mistake crept in when converting the pattern for straight needles.
I also appreciate your feedback. Currently this is a free pattern rather than a full tutorial, but I’m actually planning to make a full video tutorial for this hat pattern, after I hopefully add more sizes for it. Full pattern videos take me ages to make, so I focus on creating the free patterns first.
I do have a stockinette beginner beanie hat pattern with more videos, including a full video tutorial for the knit in the round version https://www.craftfix.com/circular-knit-hat-pattern/ in case you would like to try that.
I’ll also email you a link to the PDF versions of that pattern (straight needles & circular), usually only available to my newsletter subscribers, to try and make up for the pattern error you found.
Finally, sorry that the closing the top of a hat video confused you with the circular tips – I’ve added recording this with straight needles to my video request list.
Thanks & best wishes, Janine.