
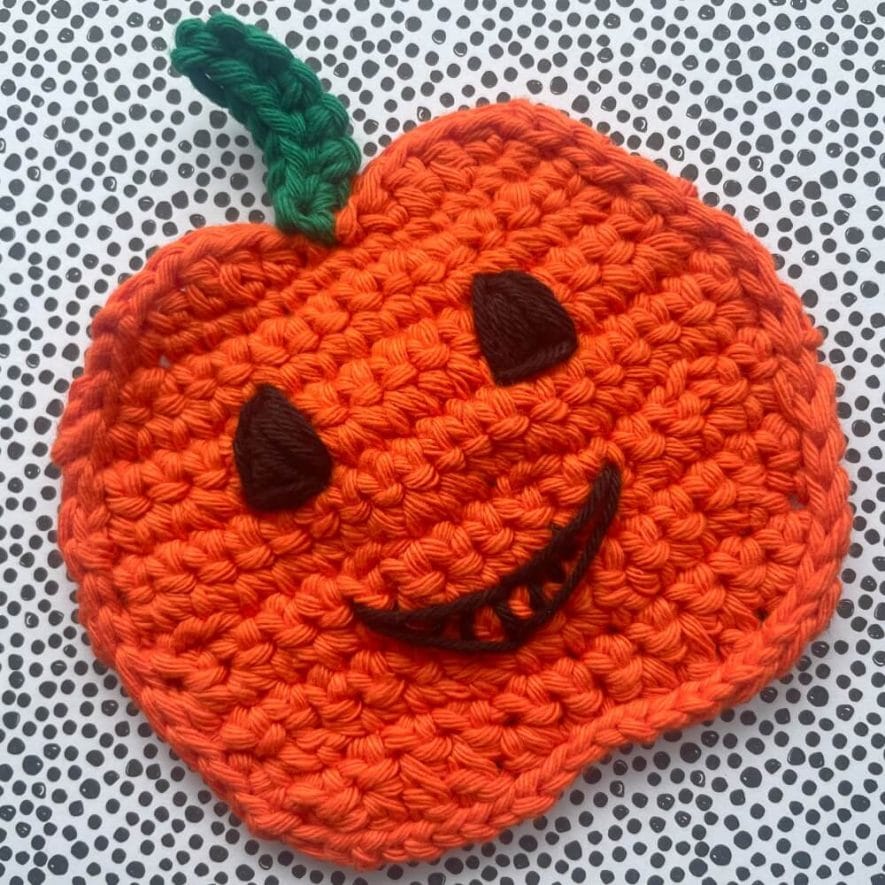
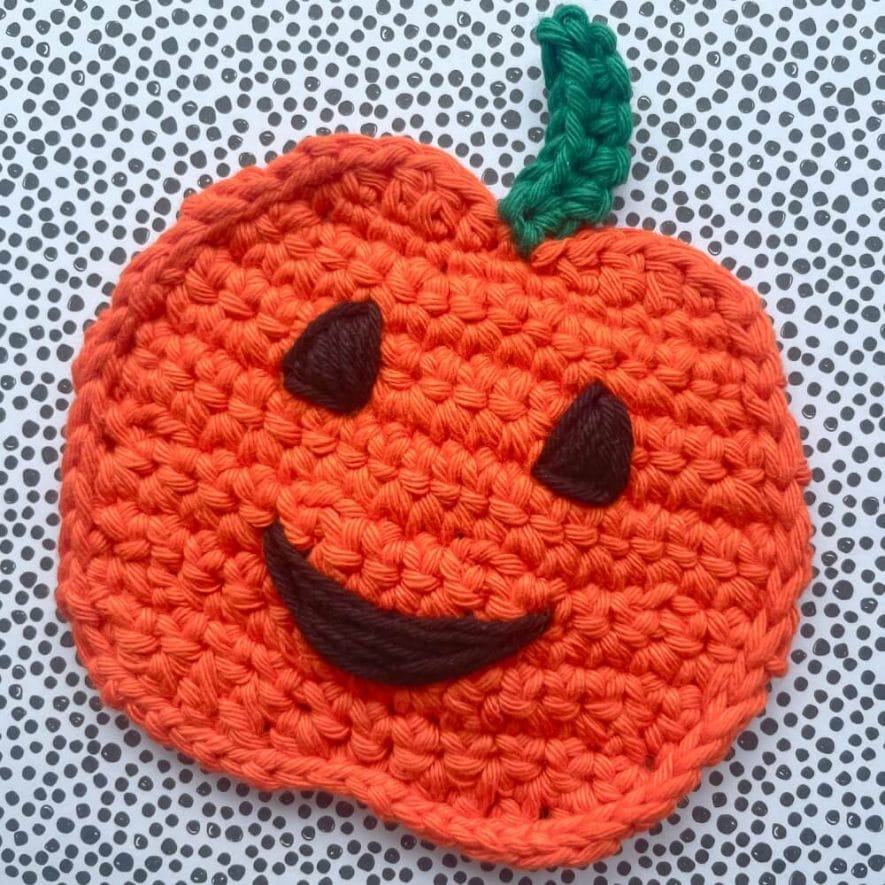
Here’s a quick and easy free pattern to crochet a flat pumpkin face decoration.This motif is one of my Halloween garland crochet motif patterns.
You can also crochet this pumpkin pattern & attach it as an embellishment or appliqué to a blanket, costume or any other Halloween craft project.
Materials & Notes
- Orange DK yarn. I used Rico Creative Cotton Aran shade 74 orange (which crochets like DK for me) and King Cole Dollymix DK acrylic in shade 144 orange.
- Green DK yarn – small scrap for stalk. I used Rico Creative Cotton Aran (shade 49 green).
- Black yarn or embroidery floss for eyes & mouth. I used Ricorumi DK (shade 60 black).
- 3.5mm crochet hook – I use Addi swing hooks
- Embroidery needle
- Optional: fabric stiffener. I used Dylon spray starch.
Finished size: 10-11cm wide by 8-9 cm tall approx (excluding stalk) using DK yarn.
Gauge is not important here so you can use any weight yarn. Your pumpkin will just be a bit bigger or smaller. Make sure you change the hook size too. I suggest using a hook a bit smaller than standard here e.g. you could try 4.5mm with aran or worsted yarn instead of 5mm.
I like using cotton for a premium look or acrylic yarn also works well as it is fairly sturdy & very affordable.
Abbreviations
NB this pattern uses US crochet terms. The equivalent UK crochet stitches are listed after each term.
- R – row
- yoh – yarn over/around hook
- st – stitch(es)
- ch – chain
- sl st – slip stitch
- sc – single crochet stitch (UK: double crochet)
- sc2tog – single crochet 2 stitches together to reduce to 1 stitch (UK: double crochet 2 together)
- hdc – half double crochet stitch (UK: half treble crochet)
- dc – double crochet stitch (UK: treble crochet)
- sc x N – do a single crochet (or the stitch type stated) in the next N stitches (UK: double crochet in next N stitches) e.g. sl st x 3 means do 1 sl st in the next 3 st.
- Xsc – do X single crochet (or the stitch type stated) stitches in the next stitch e.g. 3sc means do 3 single crochet in the same stitch (UK: do X double crochet in the same stitch), 2sl st means do 2 sl st in next st etc.
- () x N times – repeat the instructions inside the brackets () N times
How to crochet a flat pumpkin face
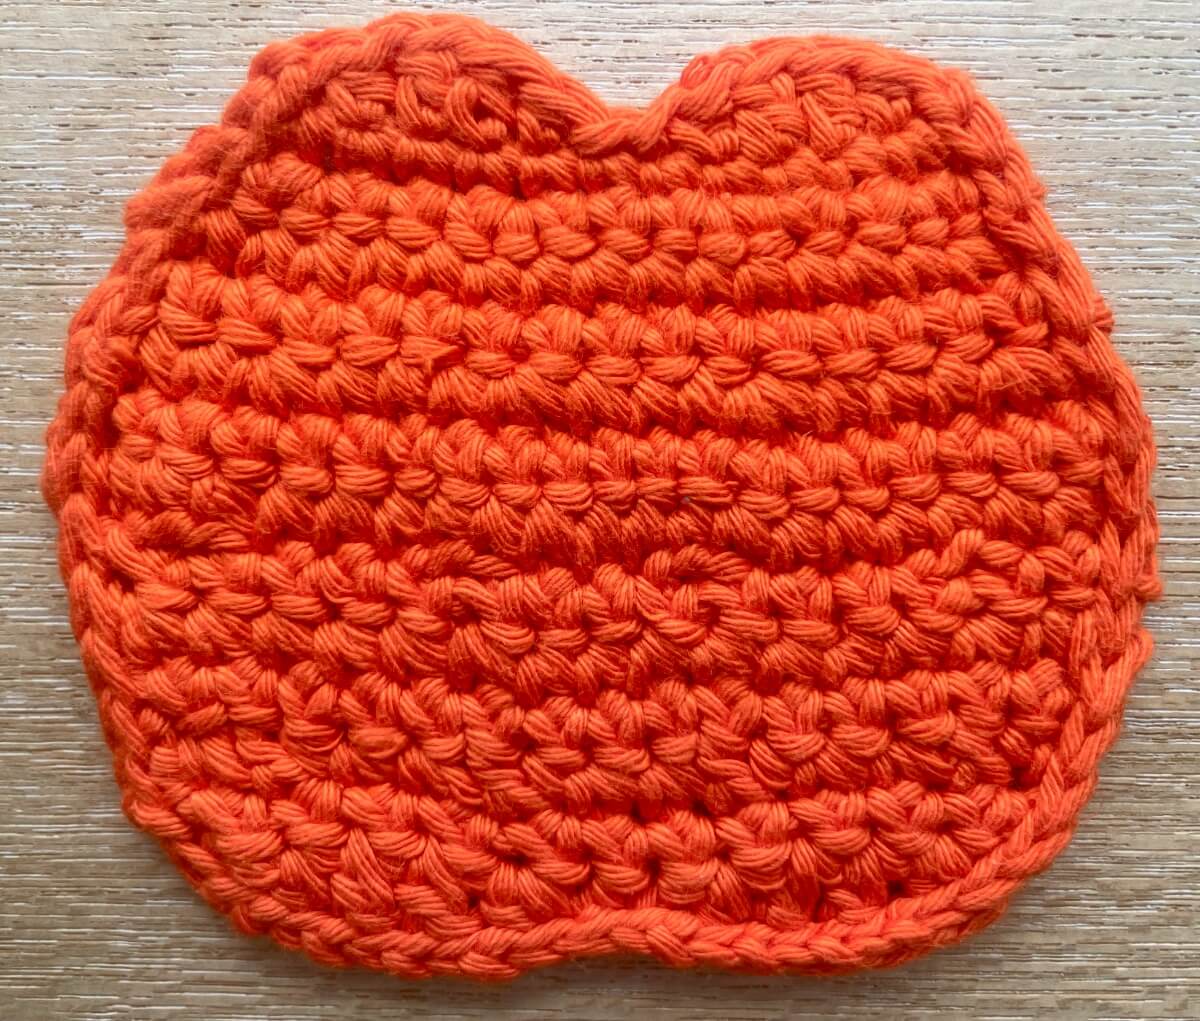
Crochet Main Pumpkin Shape
Note: turn and ch 1 after each row unless stated otherwise
R1 (right side): with orange yarn ch 13, skip 1st ch, sc in 12 ch [12 st]
R2: (sc, 2sc in next, sc in next) x 4 times [16 st]
R3-4: sc in each st [16 st]
R5: (sc x 2, 2sc, sc) x 5 times [20 st]
R6-7: sc in each st [20 st]
R8: (sc x 2, sc2tog, sc) x 4 times [16 st]
R9-10: sc in each st [16 st]
R11: (sc, sc2tog, sc) x 4 times [12 st]
R12: sc in each st [12 st]. NB no turning chain at end.
R13: (sl st, hdc, dc x 2, hdc, sl st) x 2 times.
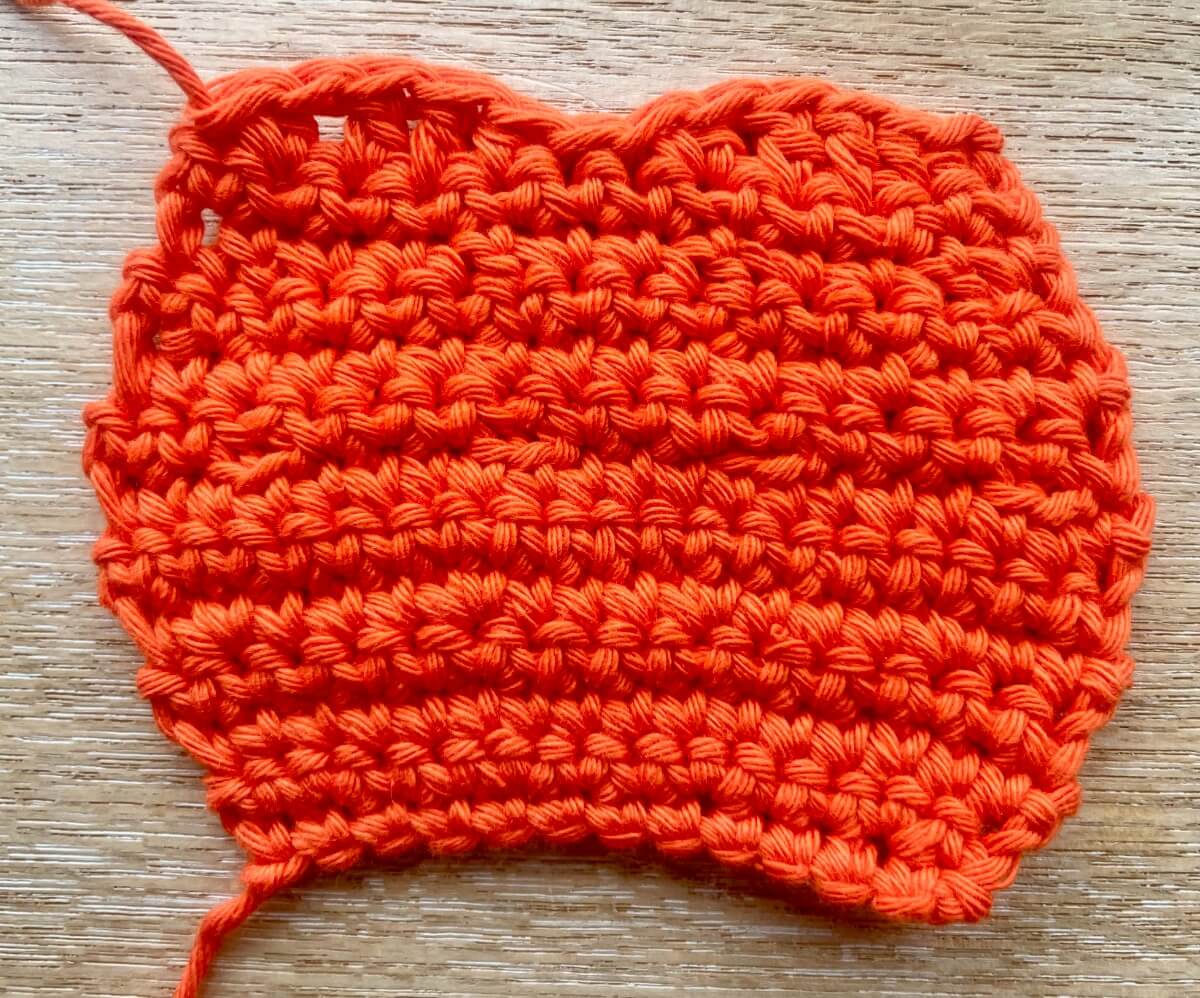
Row 13 forms the bottom of your pumpkin. Bind off.
Shape Top of Pumpkin
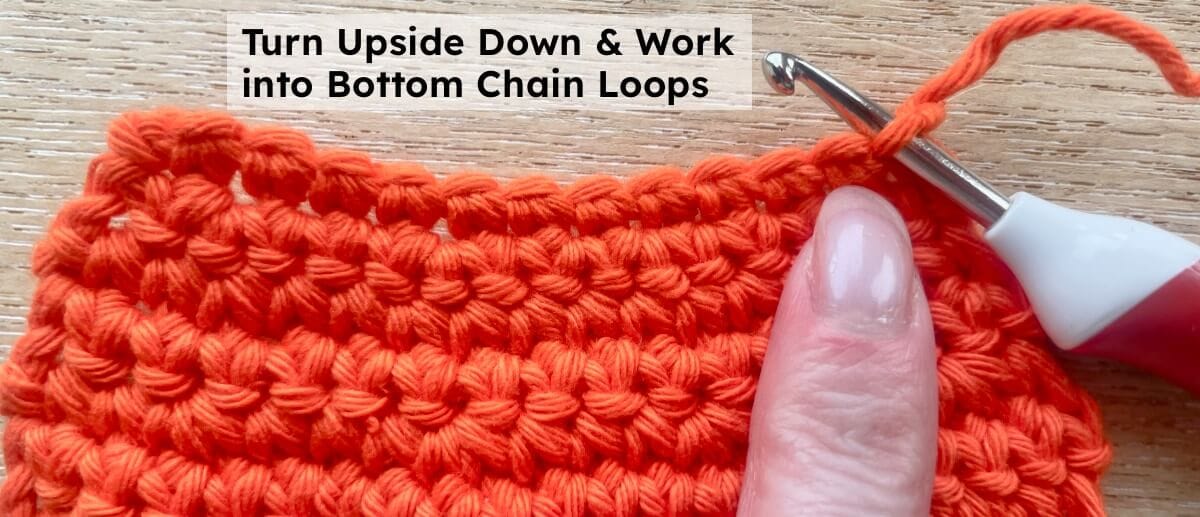
Turn your shape upside down, still on the right side. Now work into the 12 loops along the top edge left from your first (foundation) row of single crochet.
Put your hook through the 1st loop & pull a yarn loop through. This loop acts like a slip stitch.
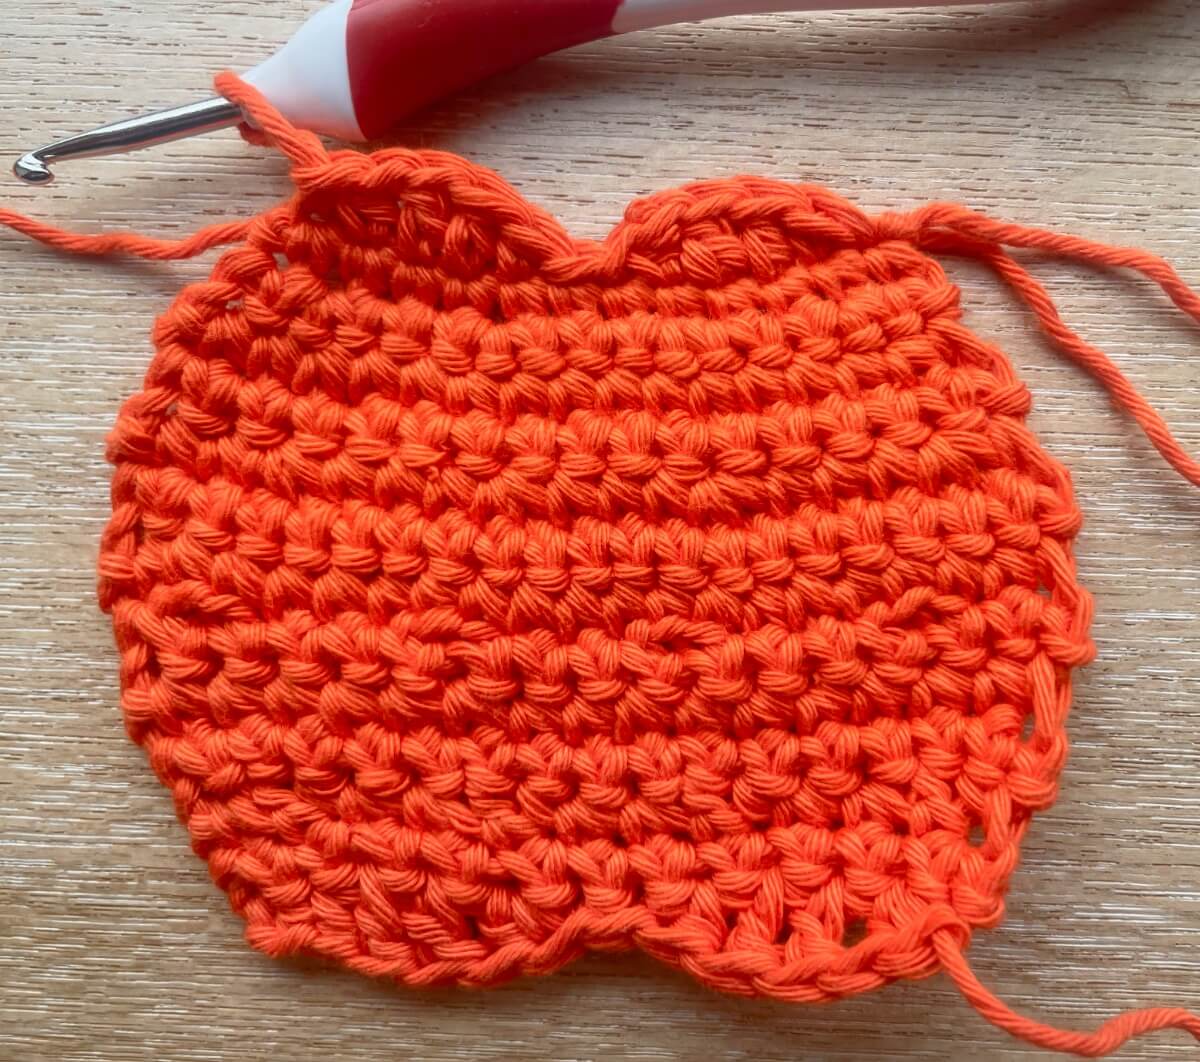
Now repeat row 13 above, starting with the hdc in the 2nd loop, to form the top curves of the pumpkin.
If you are not familiar with crocheting into both sides of the foundation chain, here’s a photo & video tutorial from Wool & the Gang.
Outline Pumpkin (optional)
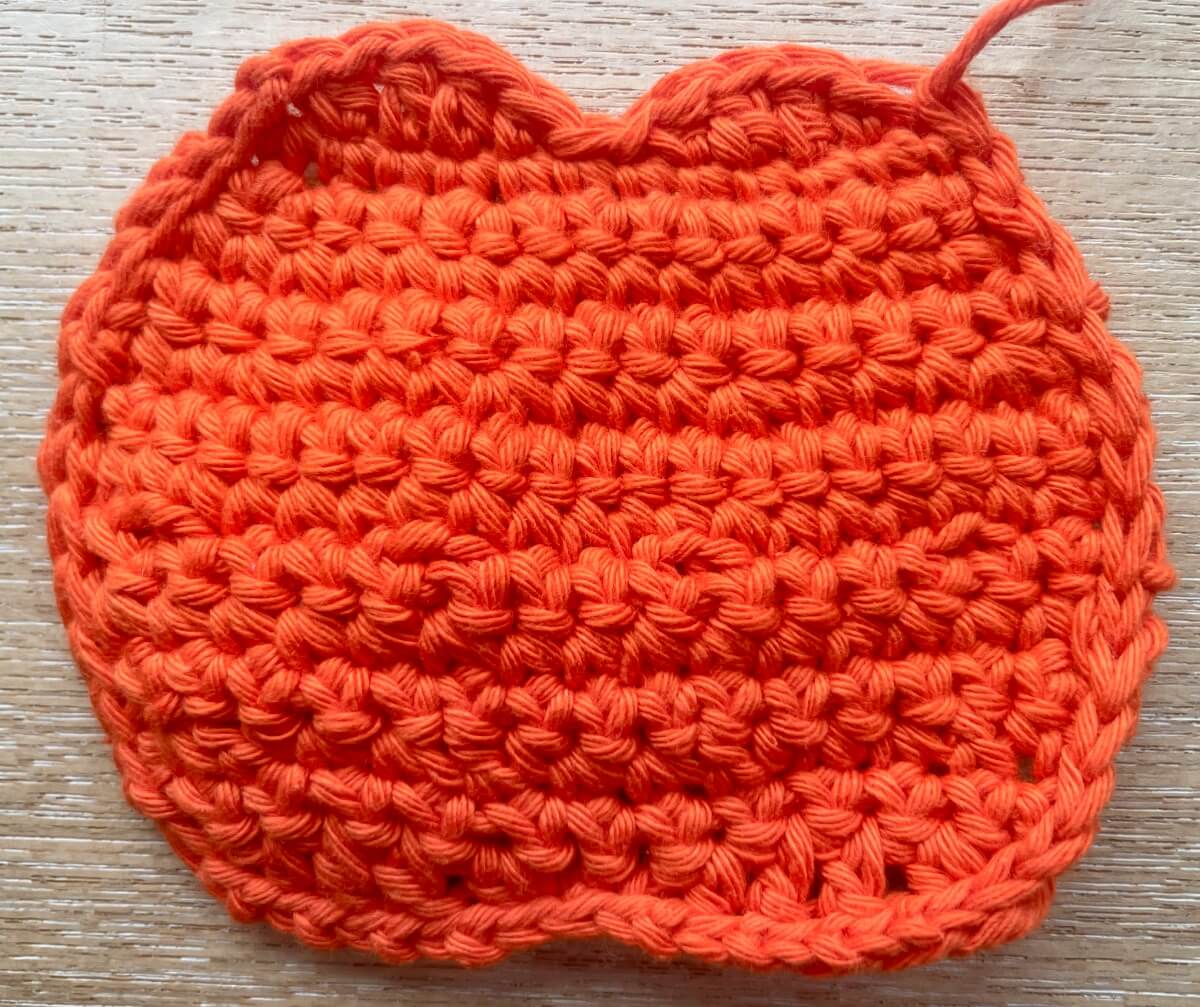
To neaten the pumpkin edges, instead of fastening off now, sl st down the left side, across the bottom curves & up the right side. Fasten off at the top right corner.
Add plenty of slip stitches so your shape will flatten once blocked. I made 14-16 sl st on each side.
Along the bottom I did 2 sl st in each hdc & dc as follows: sl st, 2sl st x 4, sl st x 2, 2sl st x 4, sl st in last. Fasten off & weave in all ends.
Block Pumpkin (optional)
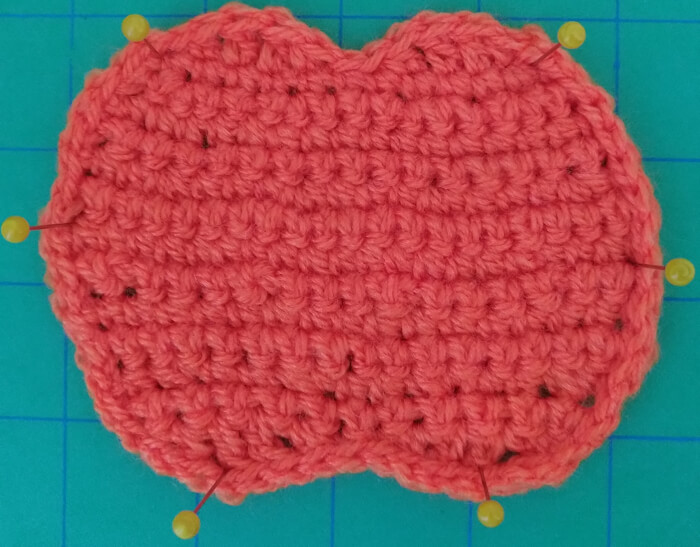
If your pumpkin does not lie flat, soak it in water, squeeze the excess water out with a towel & lay it flat to dry. Use a few pins to secure the shape if you like. Acrylic dries quite quickly, but cotton could take a day.
Add pumpkin stalk
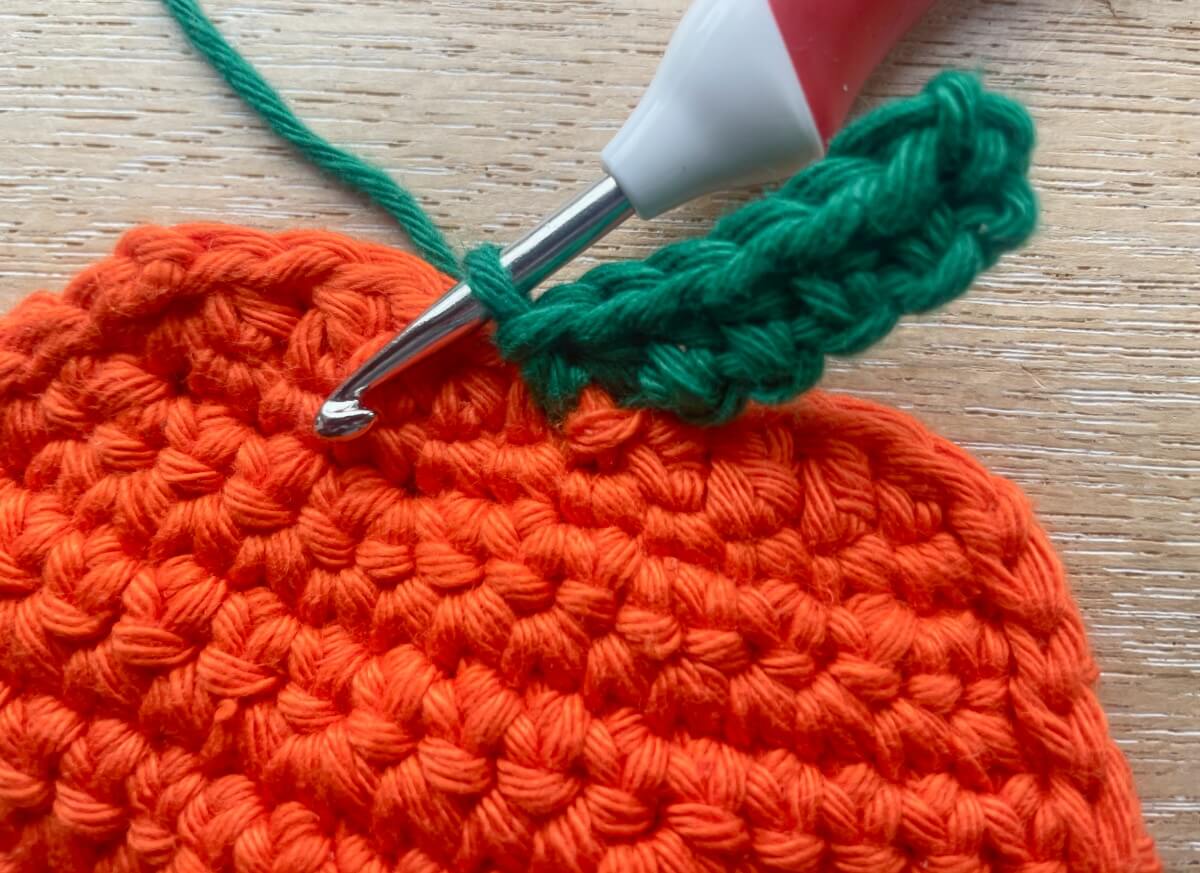
Put your hook through a central sl st in the top row. Pull through a loop of green yarn and ch 7.
Skip 2 ch, hdc in next 5 ch, sl st into a central sl st on the top of the pumpkin to complete the stalk. Fasten off & weave in ends.
Embroider eyes
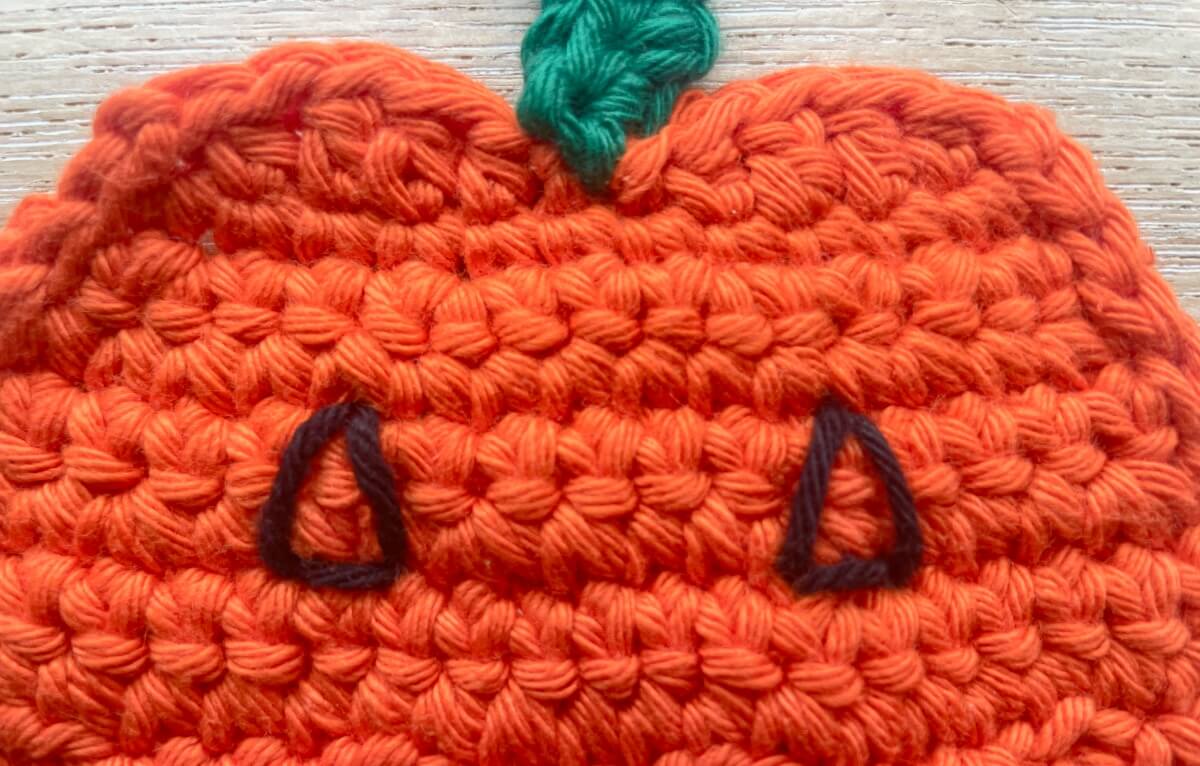
Your pumpkin is broken up into 7 horizontal bands (top & bottom curves with 5 straight bands in between). Using an embroidery needle with black yarn or floss, make 2 triangle eyes as follows:
At the bottom of the 3rd band down from the top, bring your needle up about 4 stitches in from the left side. Put your needle back down 2 stitches to the right to make the bottom eye line.
Next make the top point of the eye by coming up at the top of band 3 (2 rows up) above the midpoint of the bottom line. Make a diagonal line from top to bottom by putting your needle down through the bottom right of the eye.
Come back up at the bottom left of the eye and put your needle down through the top point to complete your triangle shape for the left eye. Now fill in the eye by making vertical and/or diagonal stitches from top to bottom.
Repeat for the right eye, starting 4 stitches in from the right. This leaves 4-5 stitches between the eyes.
Embroider mouth
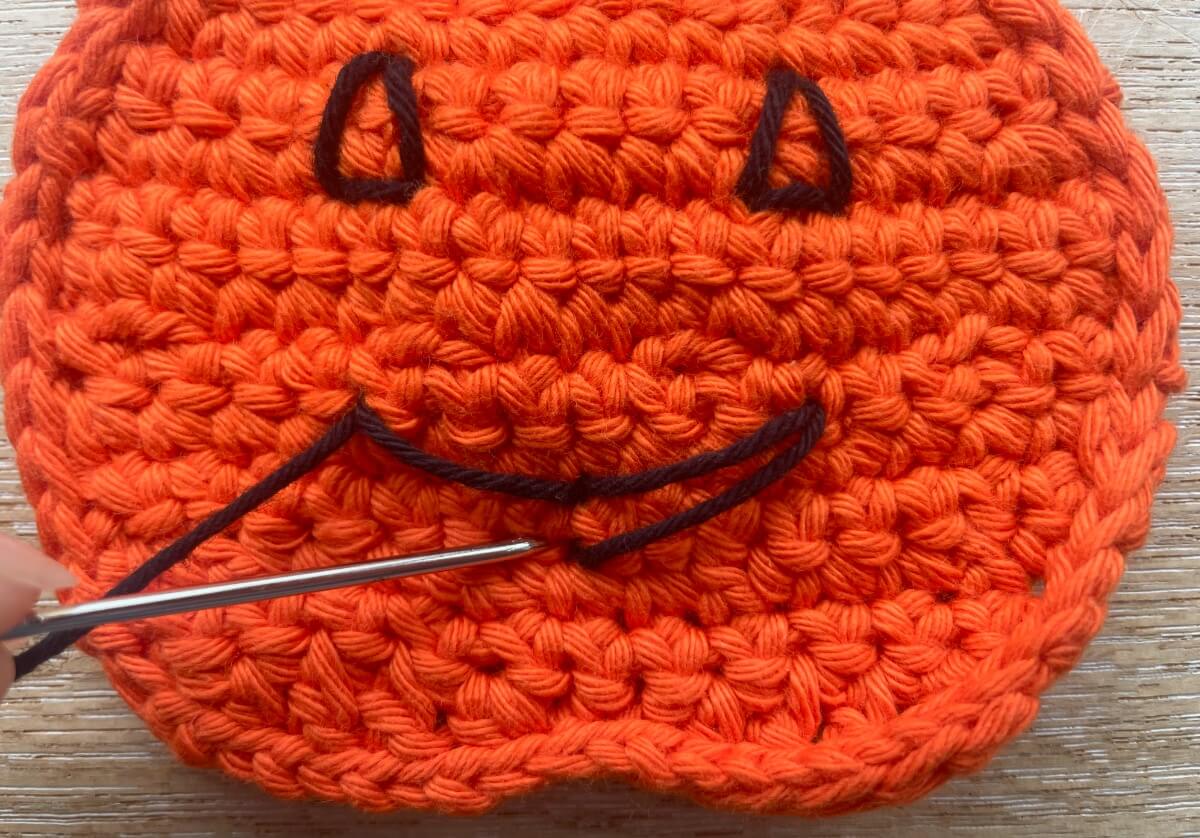
Starting about 1.5 bands (or 3 rows) below the eyes, bring your needle up in line with the mid point of the left eye to make the top left corner of the mouth.
Put your needle down about 3 stitches to the right 1 row (or half a band) down & bring it back up another 3 stitches to the right, in line with the centre of the right eye, to make the top right corner. Put your needle back down at the centre to complete the top mouth line.
Bring your needle up 2 rows below (mid band 6). Then put your needle down at the top left mouth corner, back up at the bottom centre and down at the top right corner to complete the mouth outline.
Fill this roughly with short vertical stitches, which you could leave as is for a jagged smile. Otherwise, make a couple of long horizontal stitches across the mouth on top of these to fill it fully for a solid black smile.
Finishing (optional)
You can make your pumpkin a bit more robust for hanging etc by using a fabric stiffener. I soak decorations in Beacon Stiffen Stuff if I want to make them really stiff, but I just spray with Dylon spray starch to add a bit more body and make them less floppy.
I hope you enjoy making your pumpkin. If you have any feedback or questions, just comment below. You can find my other free Halloween crochet patterns here.
This free pattern is for personal, non-commercial use only. It may not be copied, sold, translated or distributed in any way without permission.

Thank you so much for your patterns. I’m looking at the Pumpkin pattern and not sure what the abbreviation NB stands for …. “NB turn and ch 1 after each row unless stated otherwise”.. What does the NB mean?
Thanks for the assistance. 🙂
Hi Mary, the NB actually isn’t a crochet abbreviation. It’s just used in English to mean “please note”, so I’ve just replaced the NB now. Sorry for the confusion & hope you enjoy making a pumpkin 🙂
I would like to use your pumpkin on a project for a craft fair at church, is it ok?
Of course Dorothy – thanks for asking & good luck with your church fair 🙂
thanks!
Hello, after trying your ghost appliqué pattern, I’ve just tried the pumpkin. It’s lovely, thanks for the tutorial. They will be nice in my classroom.
That’s so nice to hear and I’m delighted that my patterns helped decorate your class.