

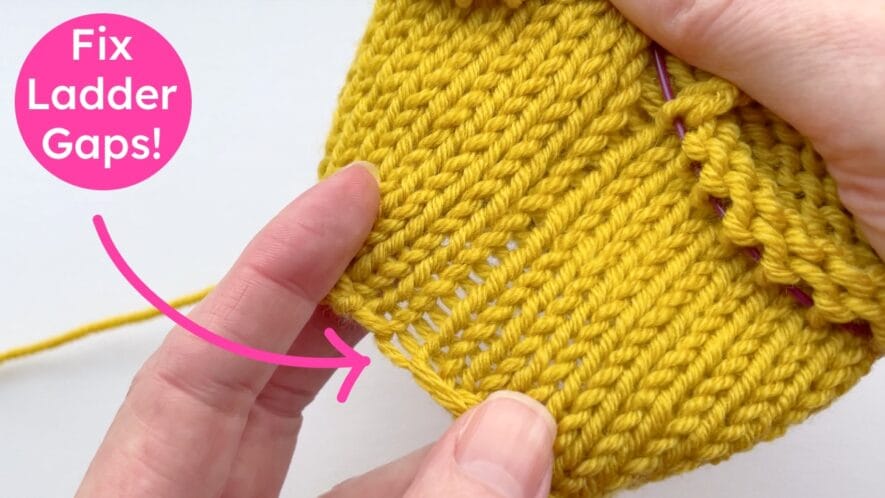
Does your magic loop knitting look wrong at the halfway points? Frustrated by pesky ladder gaps or wonky looking stitches? Solve all your problems with this better magic loop method.
Common tips for avoiding ladders knitting in the round are to snug up after the 2nd stitch, start rounds in different spots & hold the back and front together. None of these worked for me!
But I finally found a fix: Master knitter Phrancko‘s improved magic loop technique. Check out his original video demo here where I learned this genius tip.
Better Magic Loop Video Tutorial
See how to avoid magic loop ladders & other problems in my short video below or scroll down for a written guide with step by step photos:

The Quick Fix for Magic Loop Ladders
The idea is you bring 4 stitches around from the back tip before starting each half round, so that you have stitches beside each other on both tips.
This automatically gives you your natural knitting tension, so your knitting looks the same all the way around – yay!
Standard Magic Loop Knitting Steps
Here’s a quick recap of the standard magic loop knitting method, so we’re all on the same page before seeing how the better magic loop technique differs:
- Turn your knitting after half a round
- Push the front tip left to move the next stitches on to it.
- Pull out the back tip and bring it around to meet the front tip,
- Knit another half round, holding the front and back together to start.
New to magic loop knitting? Watch my 10 minute beginners video tutorial here to see this standard method in detail.
Better Magic Loop: What Changes?
The better magic loop method does things differently at step 3, but much remains the same. So you don’t need to learn a load of new stuff. You just change 1 thing which fixes everything!
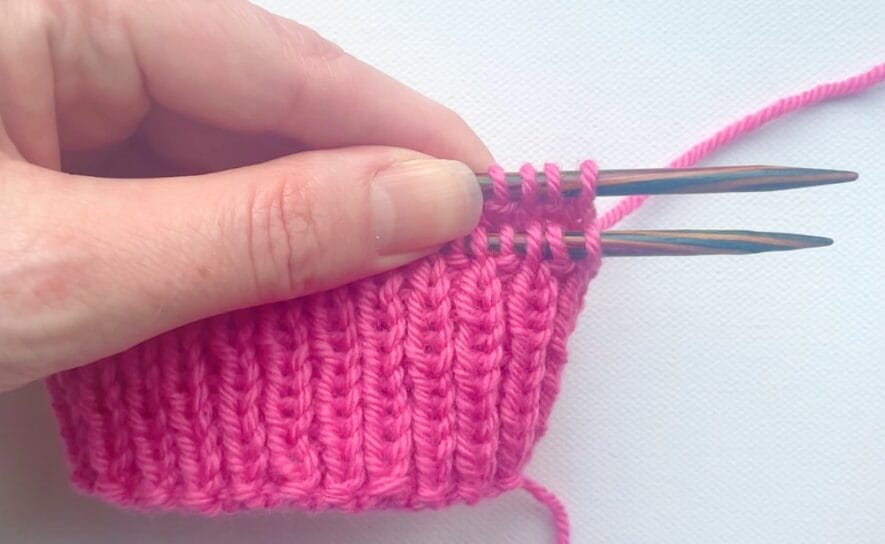
- When you get to step 3, instead of pulling the back tip all the way out, leave it where it is and count the first 4 stitches on the back needle.
- Put your finger and thumb after the 4th stitch to mark that spot holding the back needle.
- Slide the back tip out with your other hand so that your stitches, finger and thumb are on the cable. Don’t pull it out a lot like with standard magic loop – just slide it out a bit.
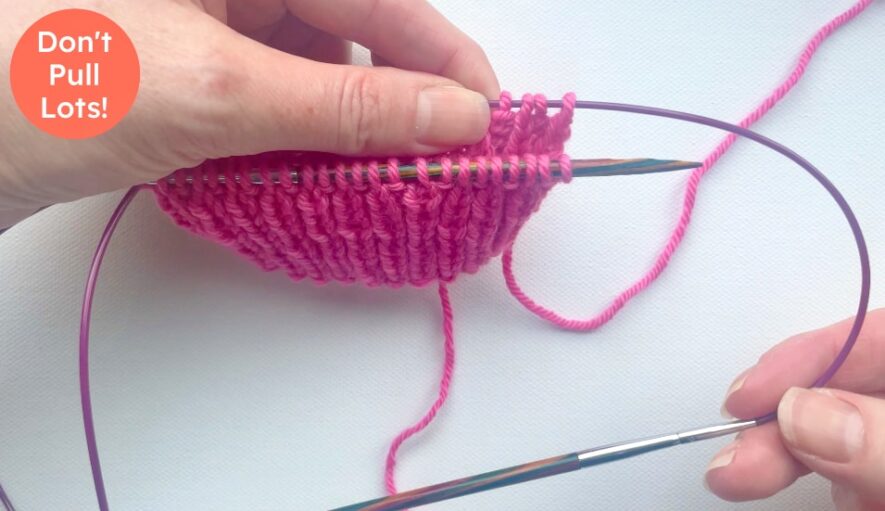
- Yank out a bit of cable cord after the 4th stitch, right where your finger and thumb are. You need a nice flexible cable for this.
- Pull up on the right side of this loop, to move the 1st 4 stitches on to your needle tip. It’s just easier here to pull your tip up to meet your stitches than the other way round.
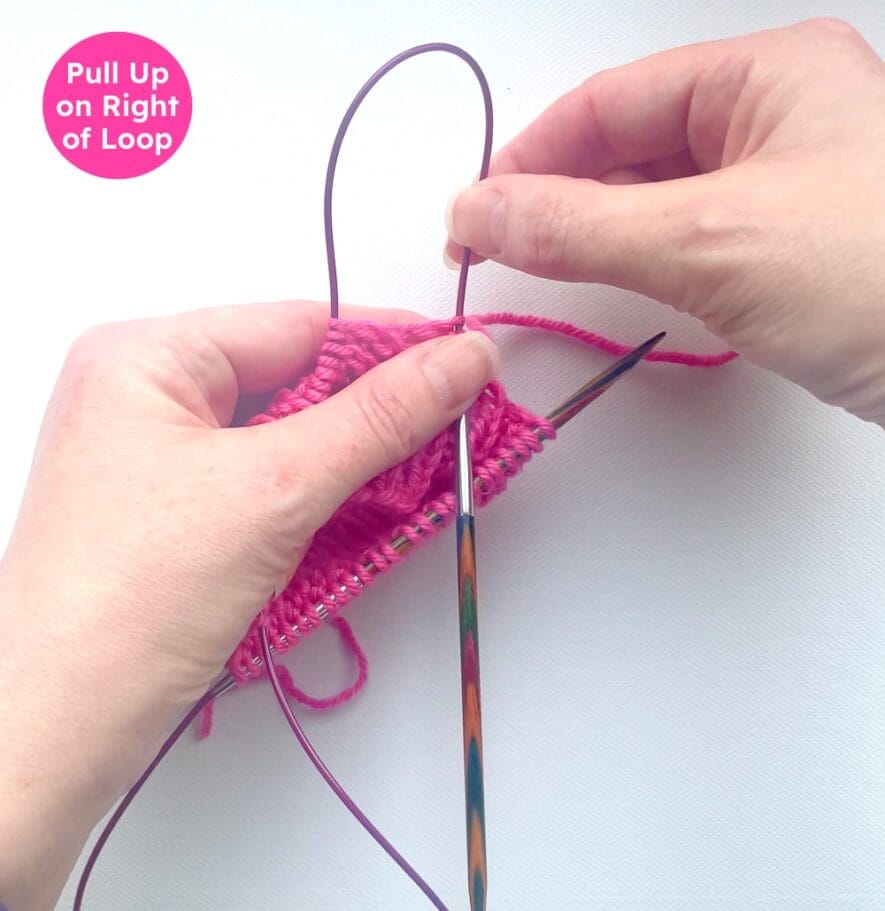
It Looks Crazy but Go With It!

This set up looks strange so let me explain:
- Your next half round of stitches is ready to knit on your front needle as usual.
- You’ve a big loop hanging out the left side and most of your stitches on your back cable as usual.
- What’s different from standard magic loop is you now have 4 stitches on your other needle tip instead of none and another loop hanging out between those 4 stitches and the rest.
Don’t worry about the gap between your 1st 4 stitches and the rest due to the loop hanging out. That’s only there briefly – it won’t stretch your stitches.
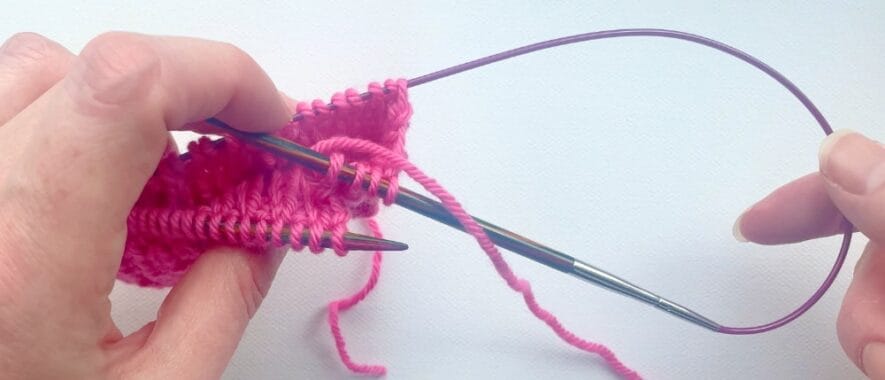
All you need to do now is take the tip with 4 stitches in your right hand and the other tip in your left. Bring your tips together and you’re ready to knit.
Now you see that familiar magic loop look, with your 2 big ear loops hanging out.
The only difference is it looks like you’ve already done 4 stitches when you start each half round.
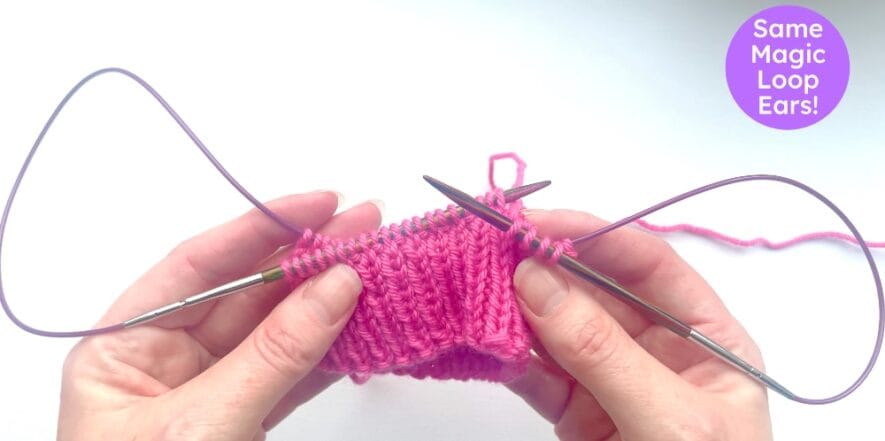
No More Ladders! Why This Fix Works
Unlike standard magic loop, you now have stitches on both needle tips before you start each half round.
Having stitches beside each other like this automatically gives you your natural knitting tension.
Think about it: this is exactly how knitting looks mid row however you knit – whether you’re using straight needles, a circular or DPNs.
So there’s no need for special measures any more. You don’t have to remember to hold things a certain way, or snug up after stitches, or do anything else to avoid ladders or wonky stitches at the halfway points.
Just knit away as usual and all will be well.
There’s no need to hold the front & back together any more as you start knitting. I actually like to hold my finger inside the tube, but do whatever feels good to you.
Heads Up: Every Round Now Starts at a Different Spot
Another reason this better magic loop technique works so well is because moving 4 stitches around every time means that you start every round in a different spot.
I’ve marked the 1st stitch for the last 4 rounds in the photo below. You can see that the starting point moves 4 stitches every round.
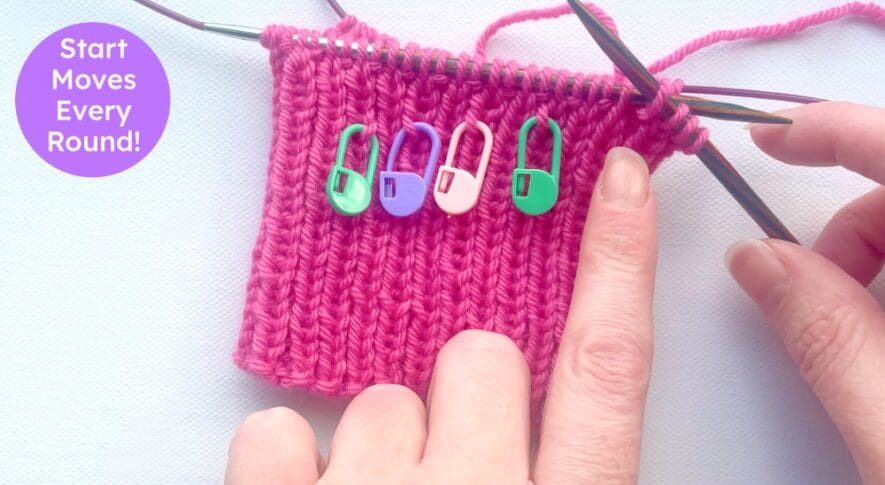
Always starting at a different stitch also helps even out any knitting tension quirks you may have.
But how do you keep track of where the original true beginning of the round is? I just use my yarn tail, which always hangs down at your first and last stitch where you joined to start knitting in the round. But you can place an end of round marker on your needle if you prefer.
I hope this handy knitting hack gets rid of ladders & any other magic loop problems you’re having, so you can enjoy knitting in the round more. Got any questions or feedback? Just comment below.


